Step by step

Figure 1.
Palatal view of the left posterior maxilla showing severe bone atrophy. Full thickness incision to expose the alveolar ridge.
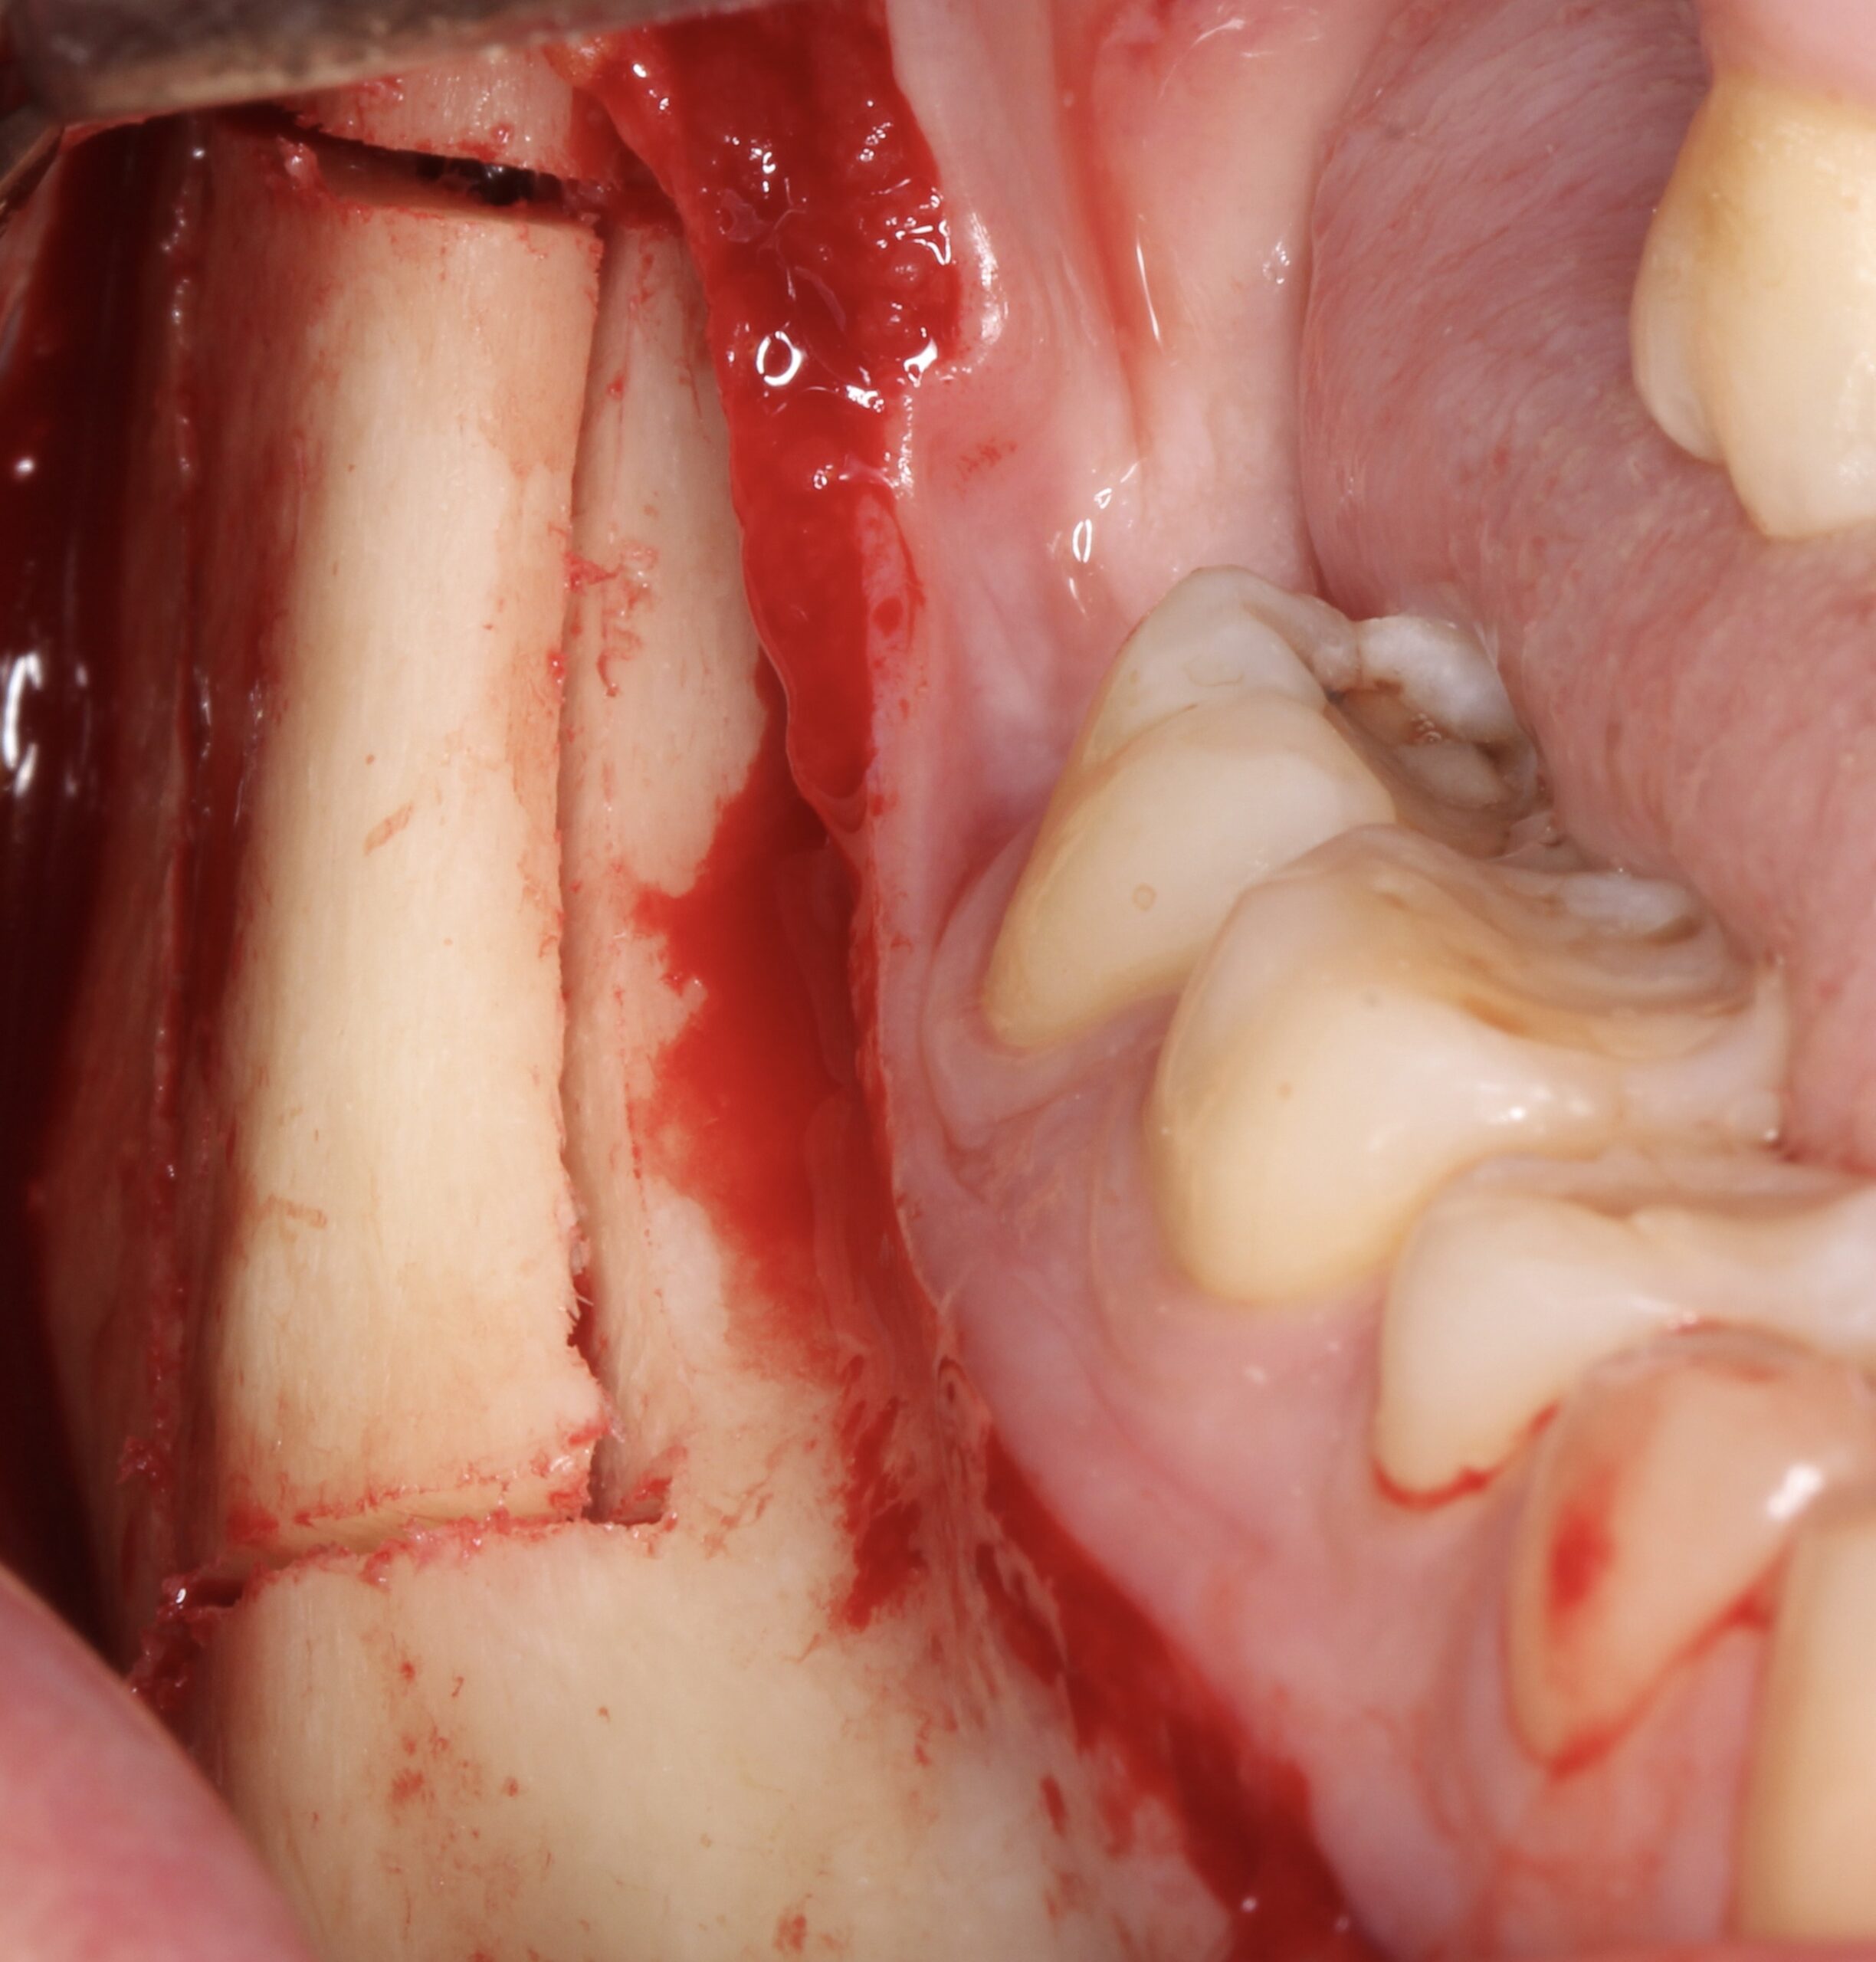
Figure 2.
Bone harvest from the right external oblique line.
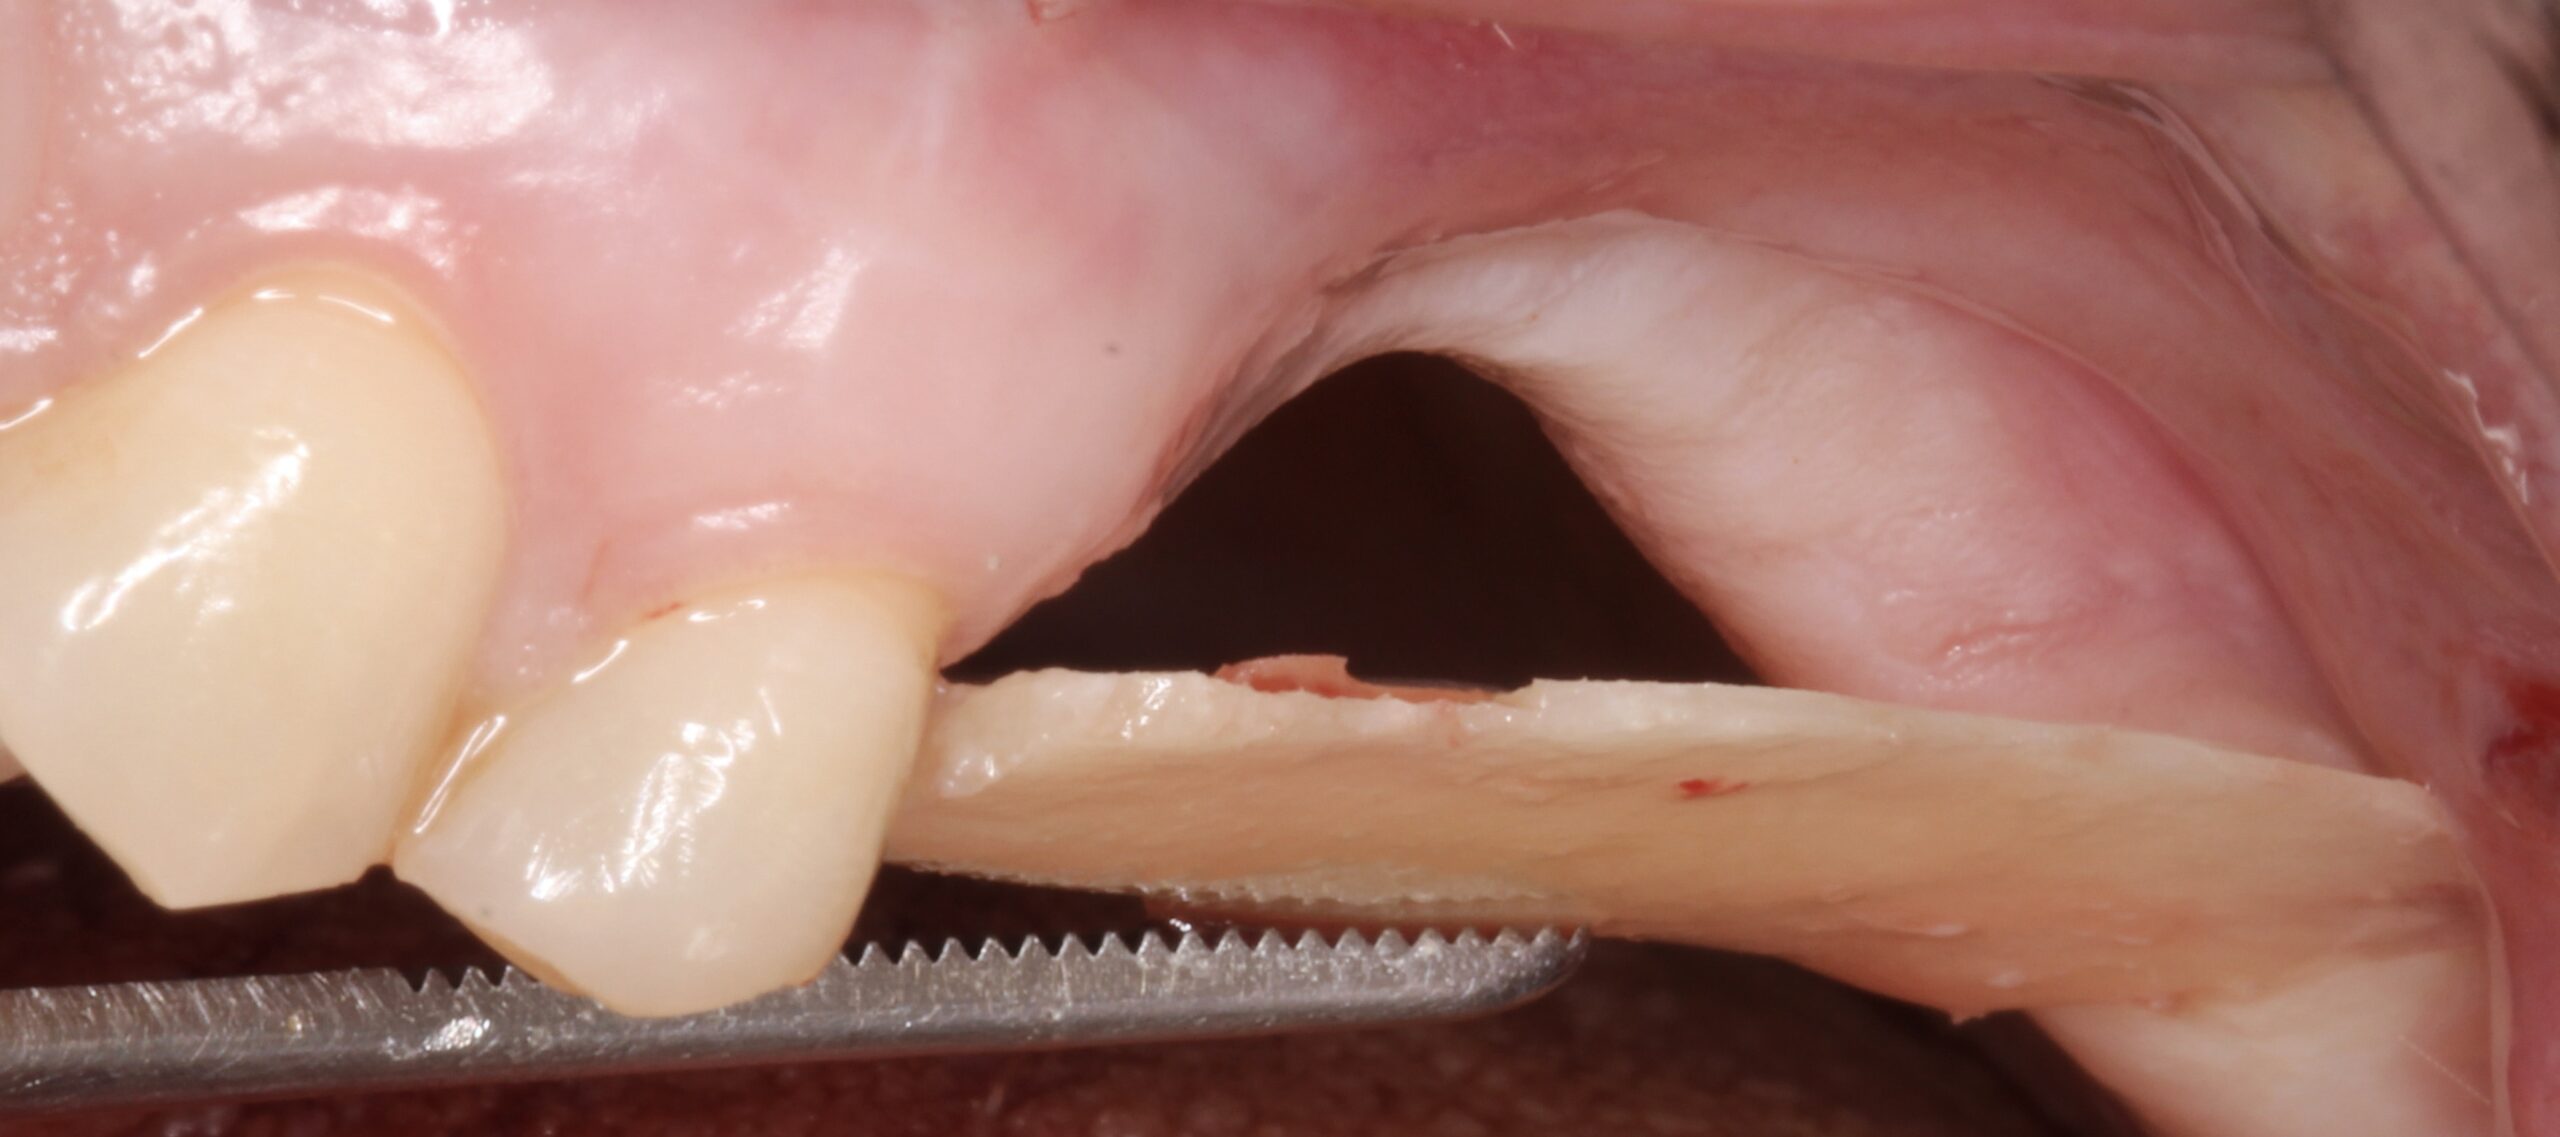
Figure 3.
Block at the resorbed left posterior maxilla before raising the flap.
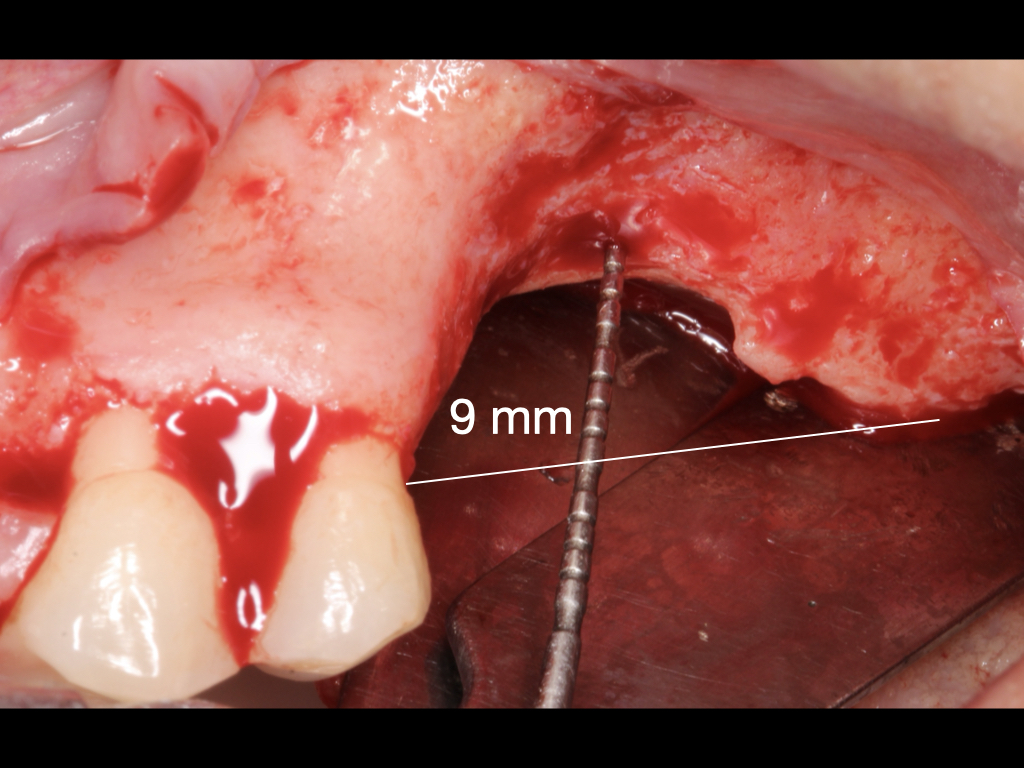
Figure 4.
After raising the flap a 9 mm vertical defect was found.
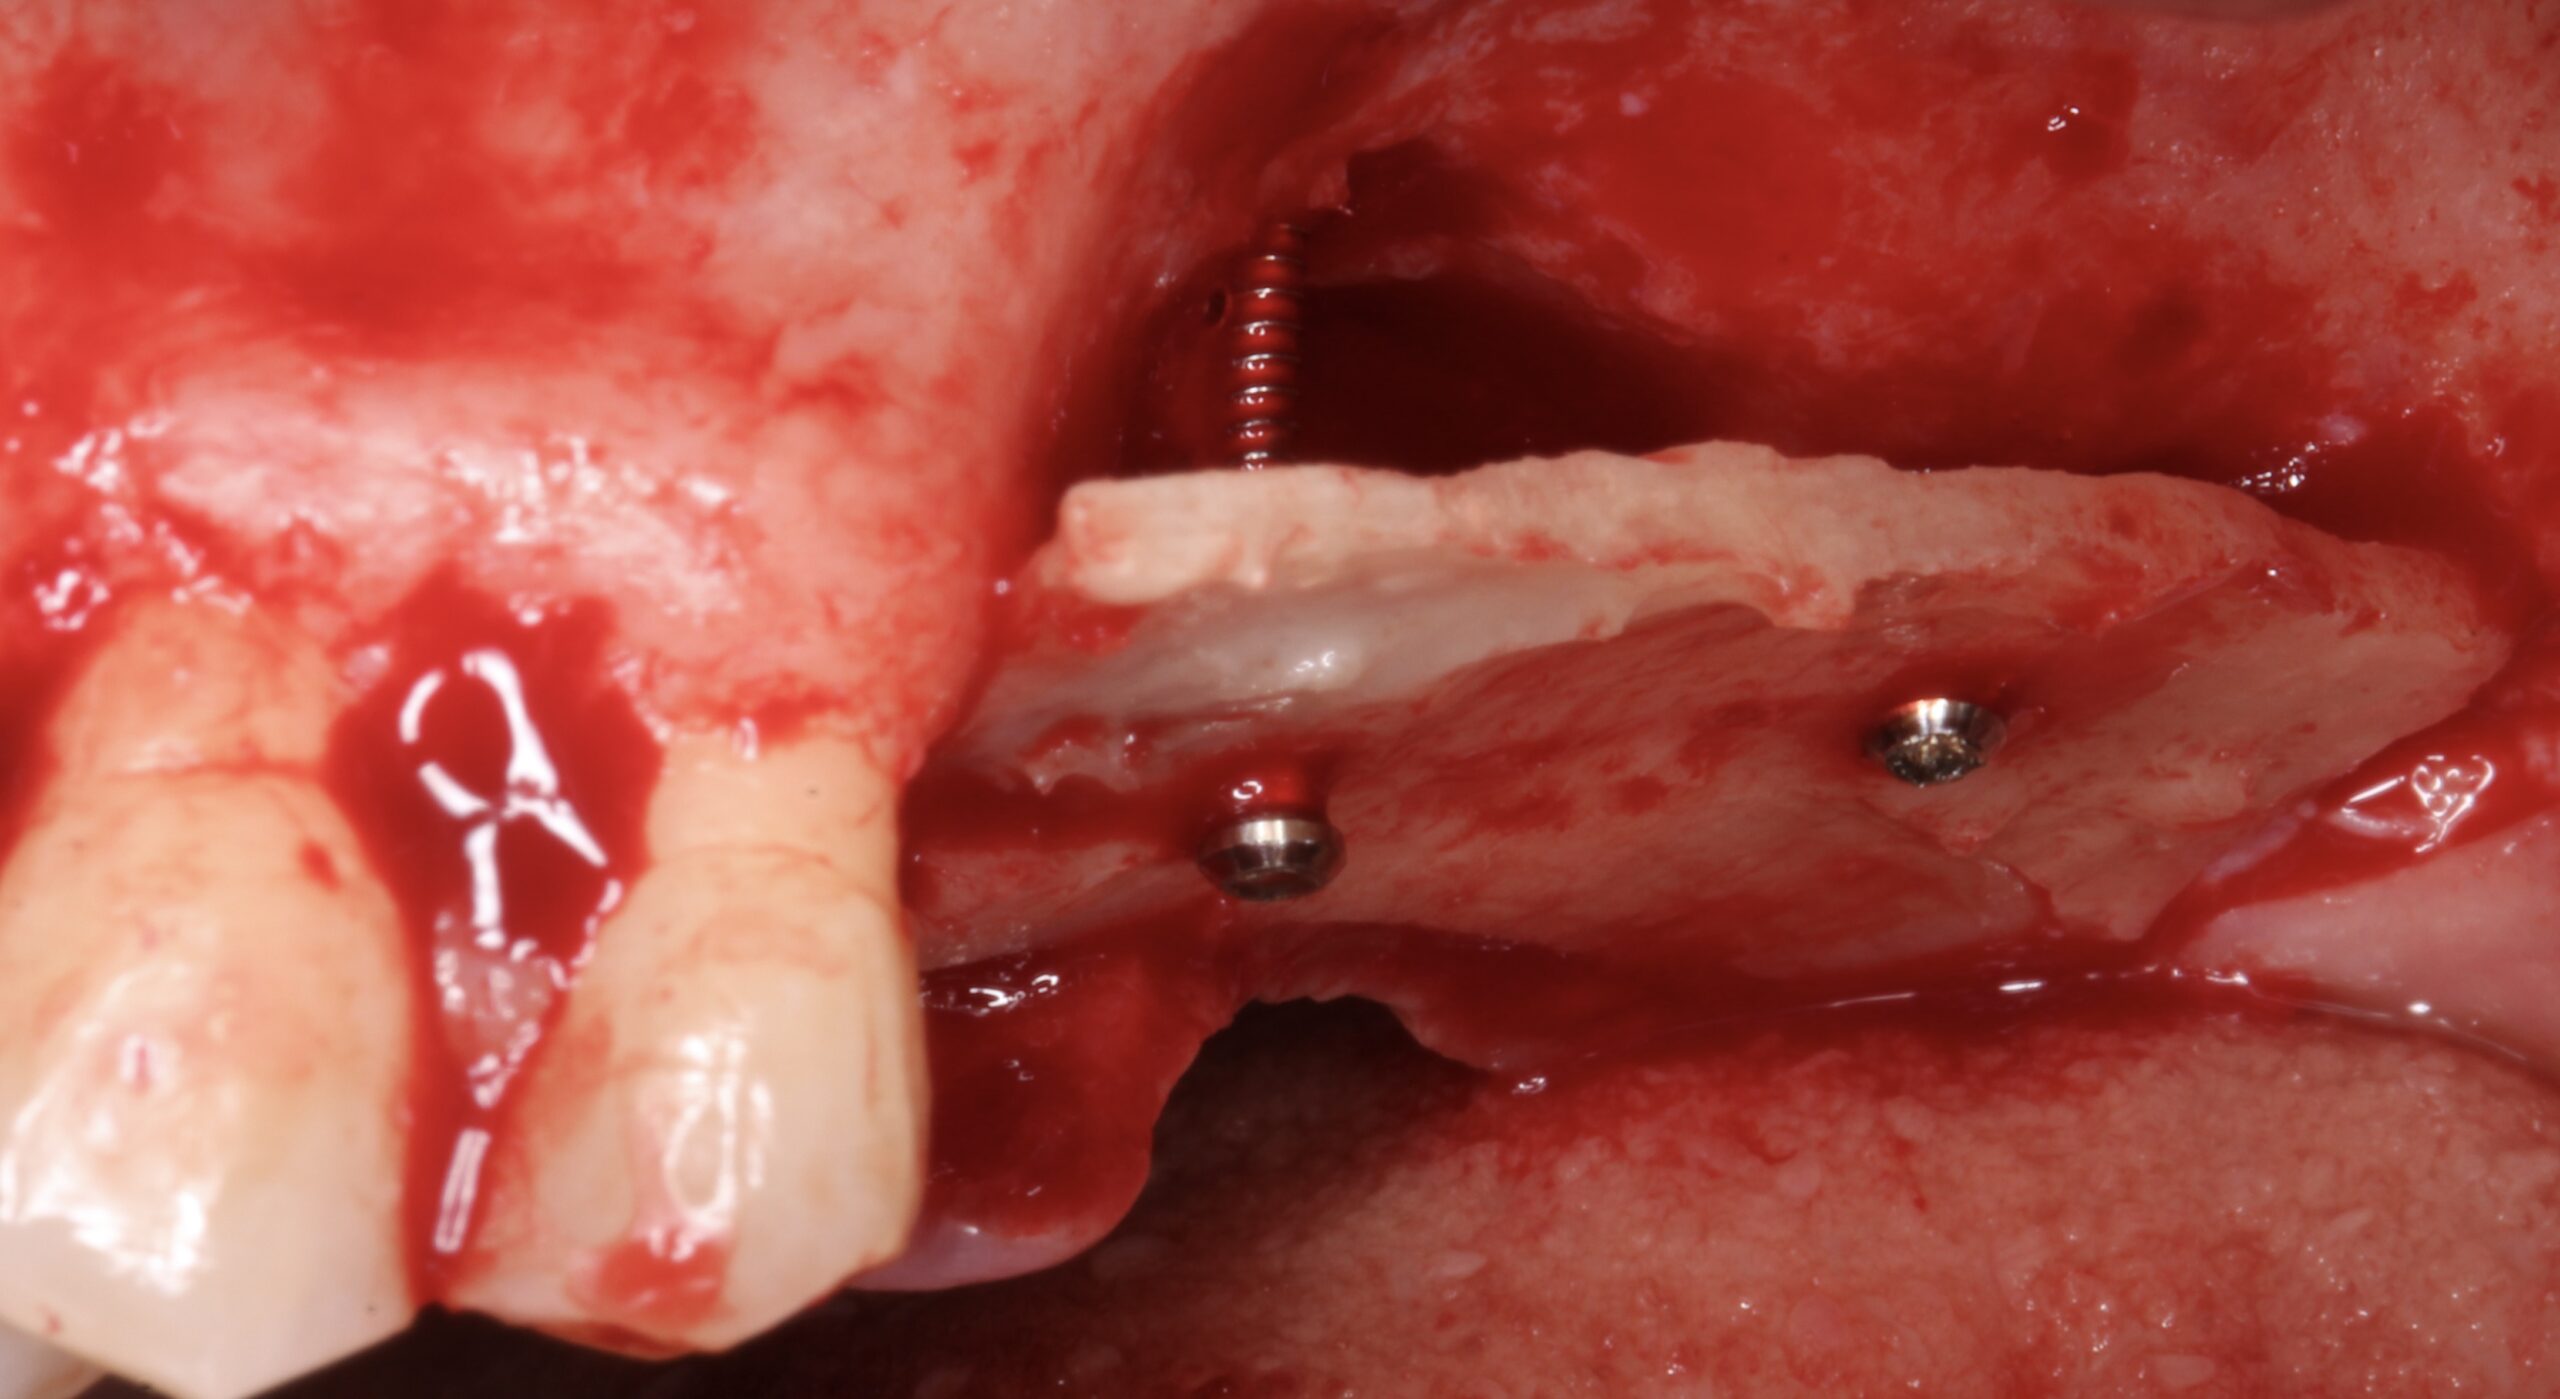
Figure 5.
A split bone block was fixed by screws at the coronal aspect of the alveolar ridge from peak to peak.
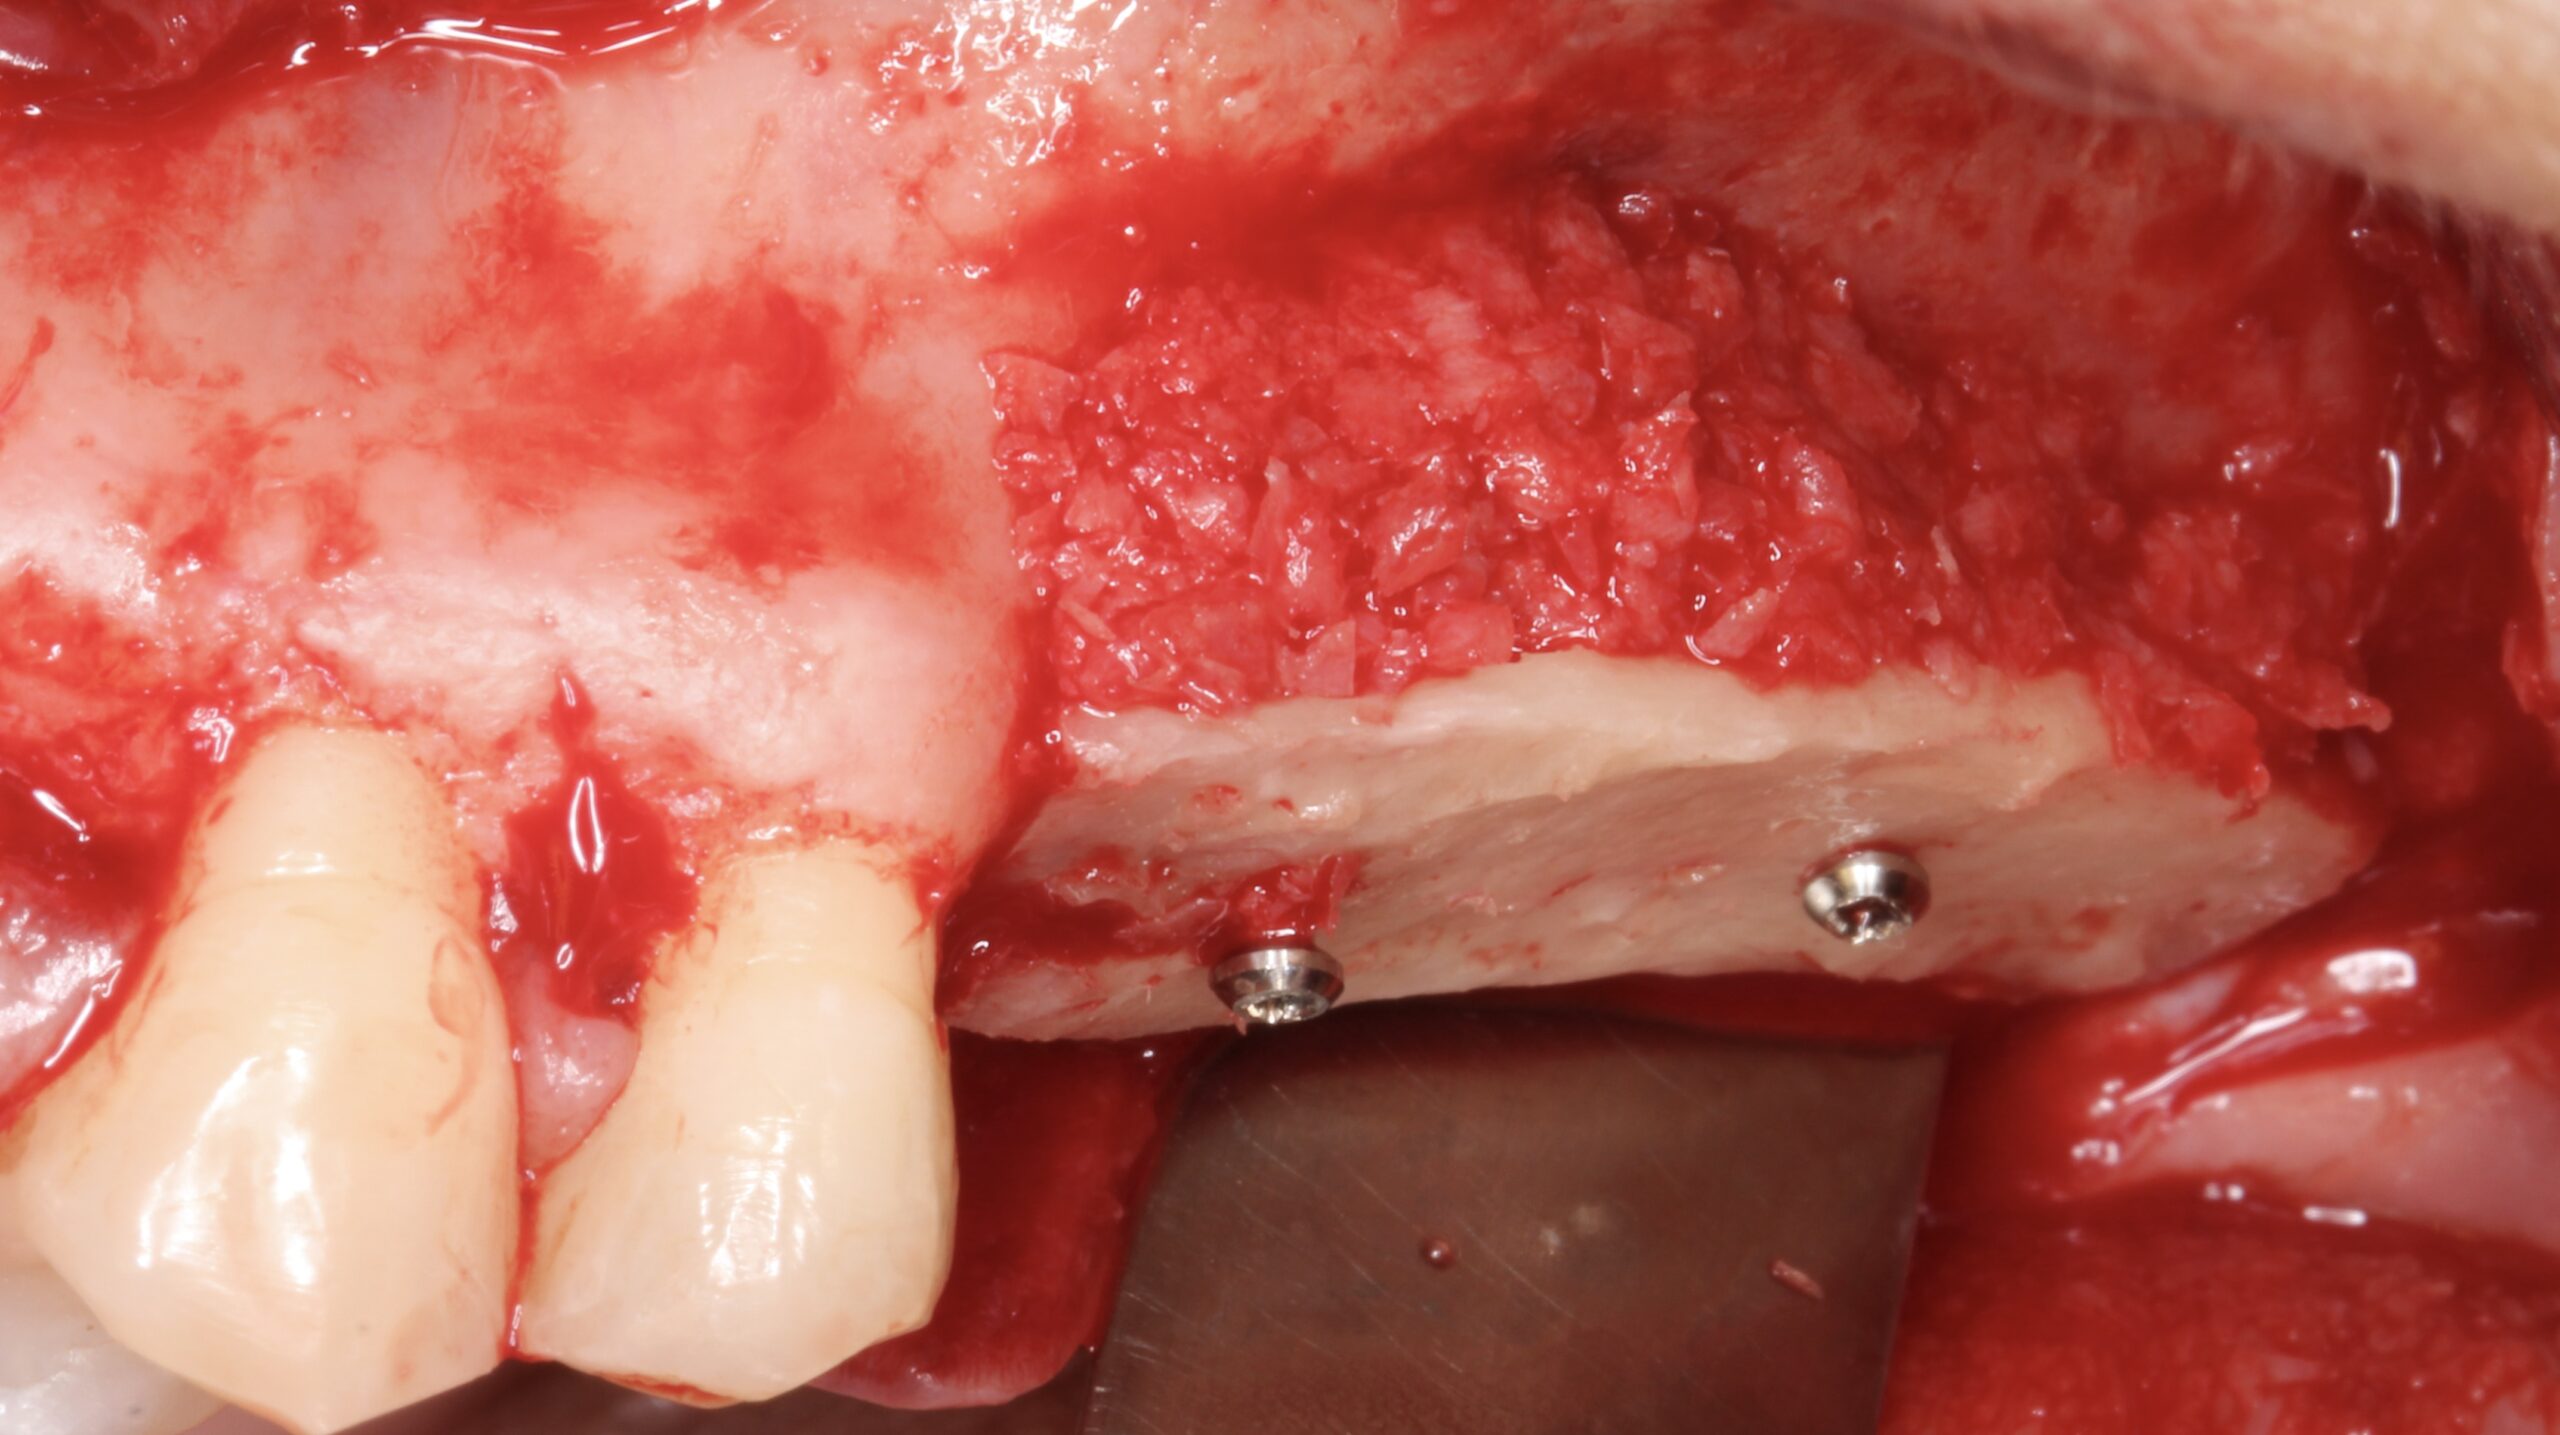
Figure 6.
The gap between the block and the alveolar ridge was filled with scraped bone chips.
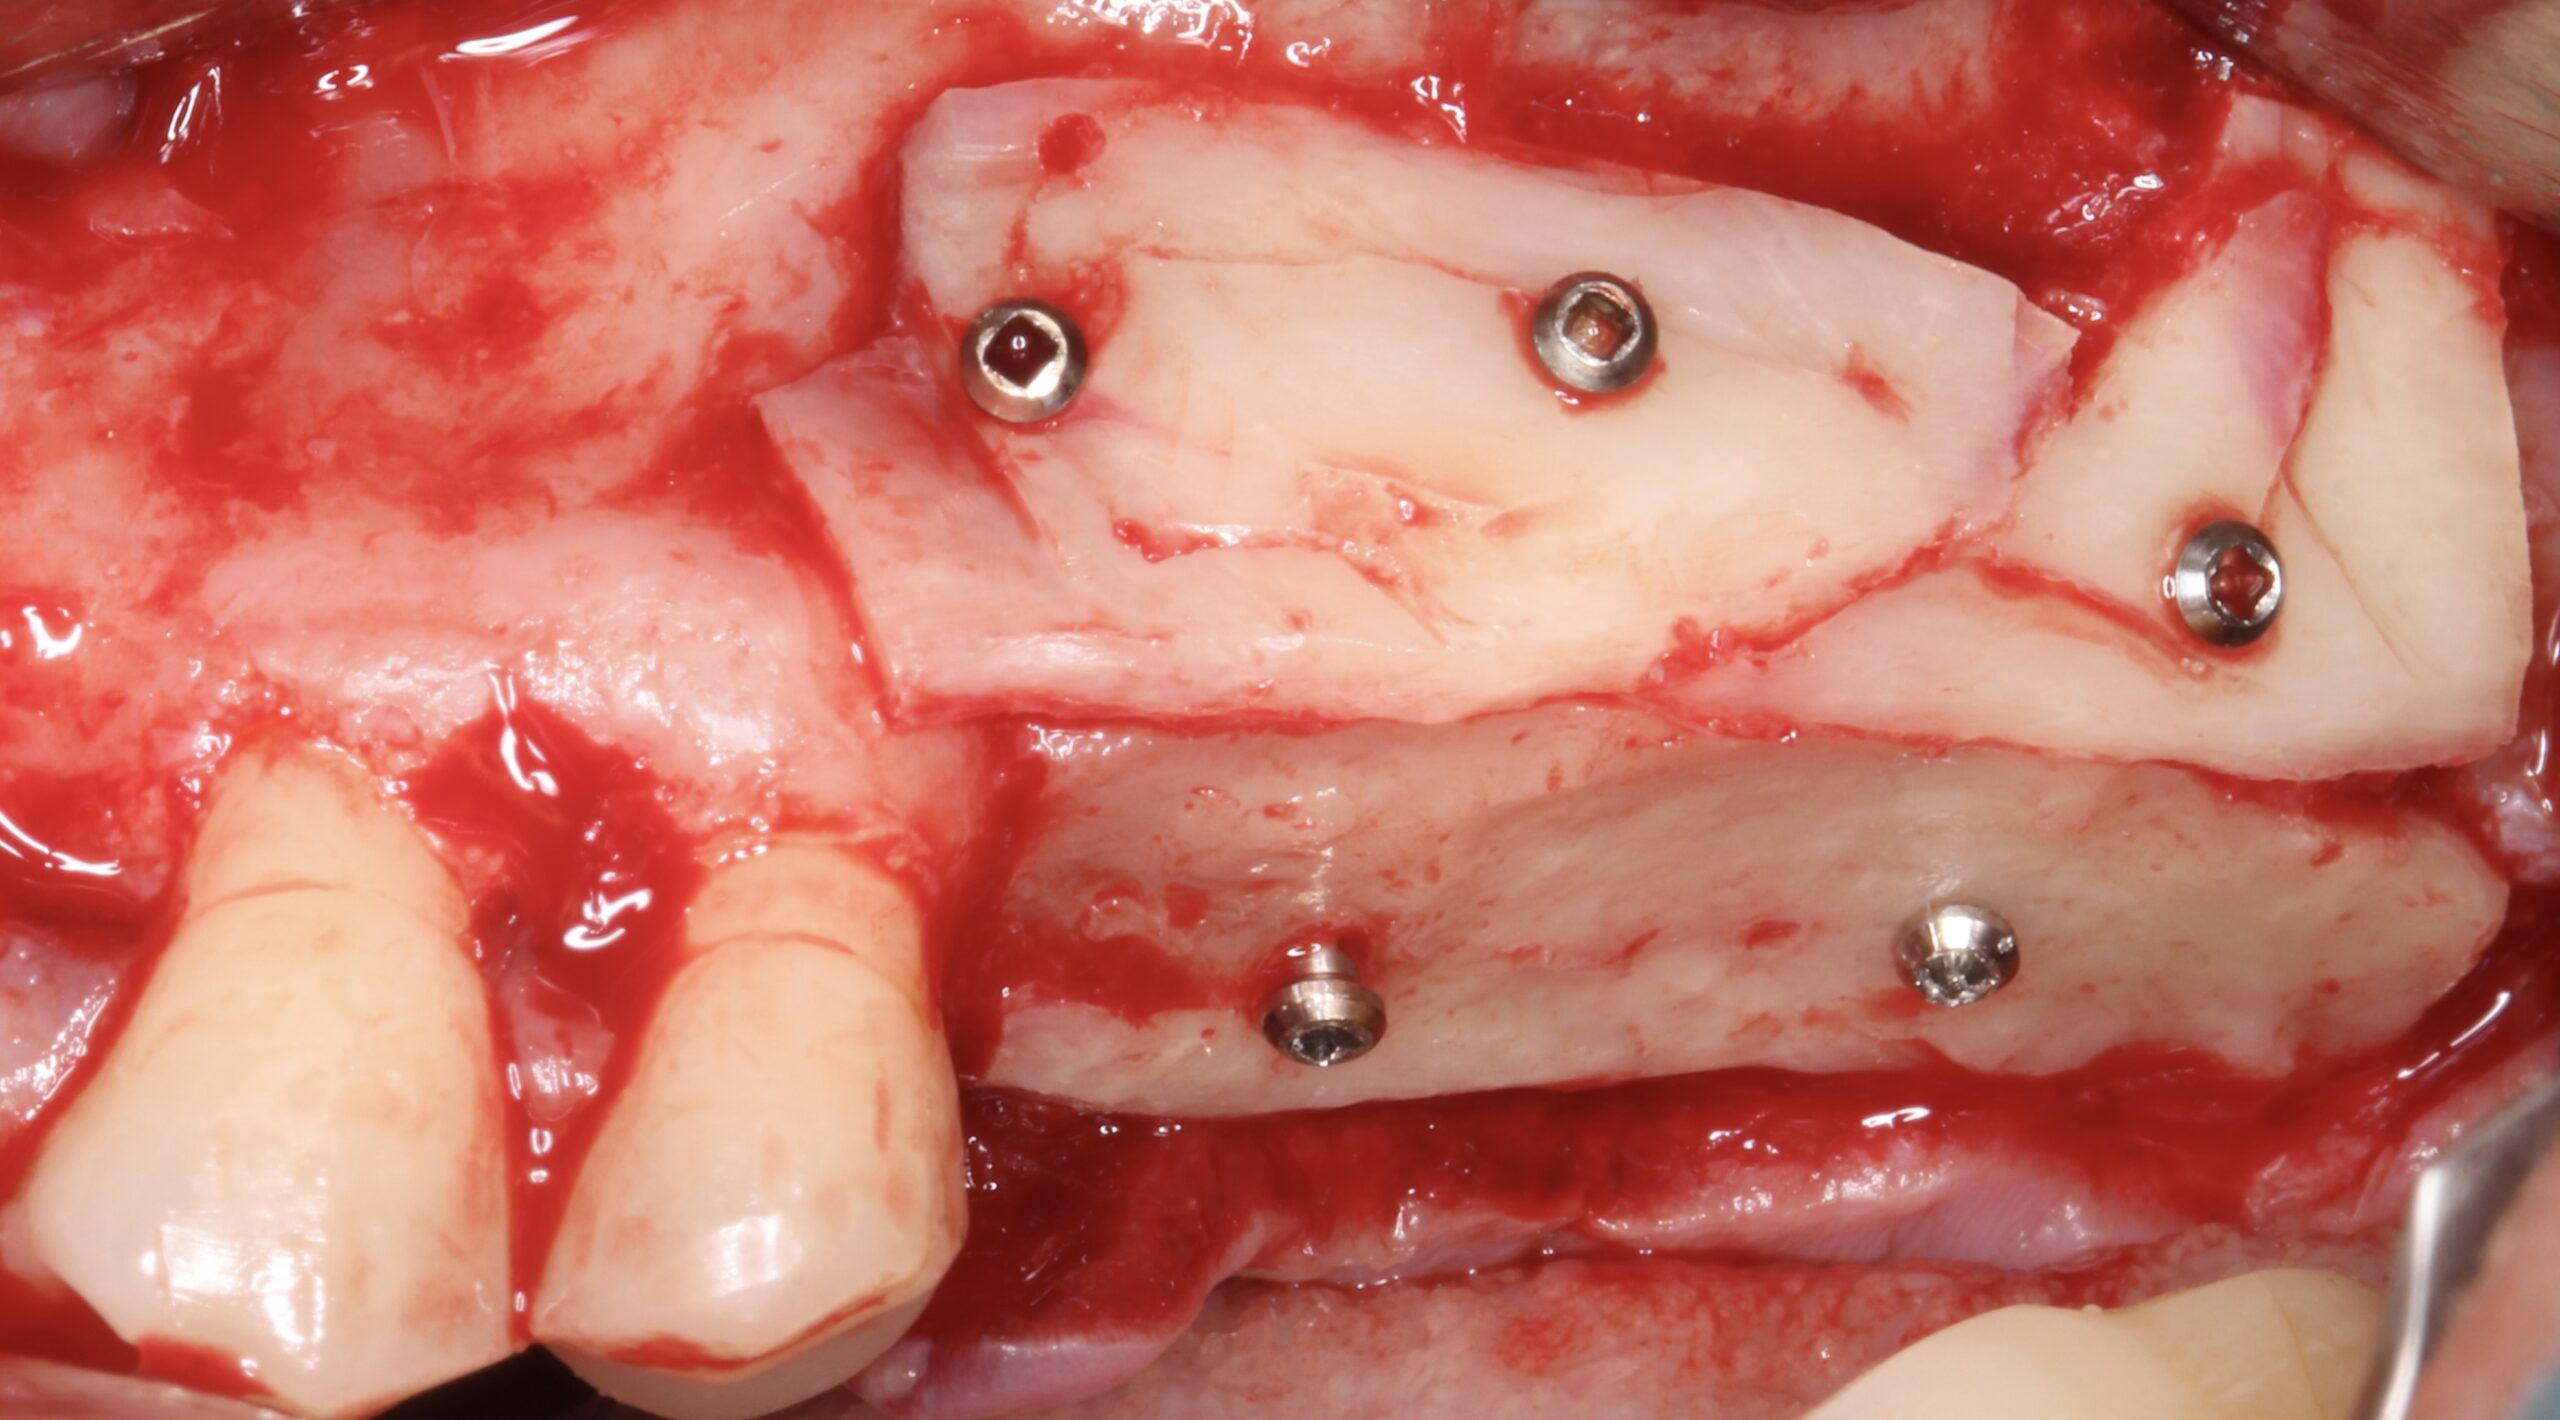
Figure 7.
Another split block was used to cover the exposed scraped bone chips.
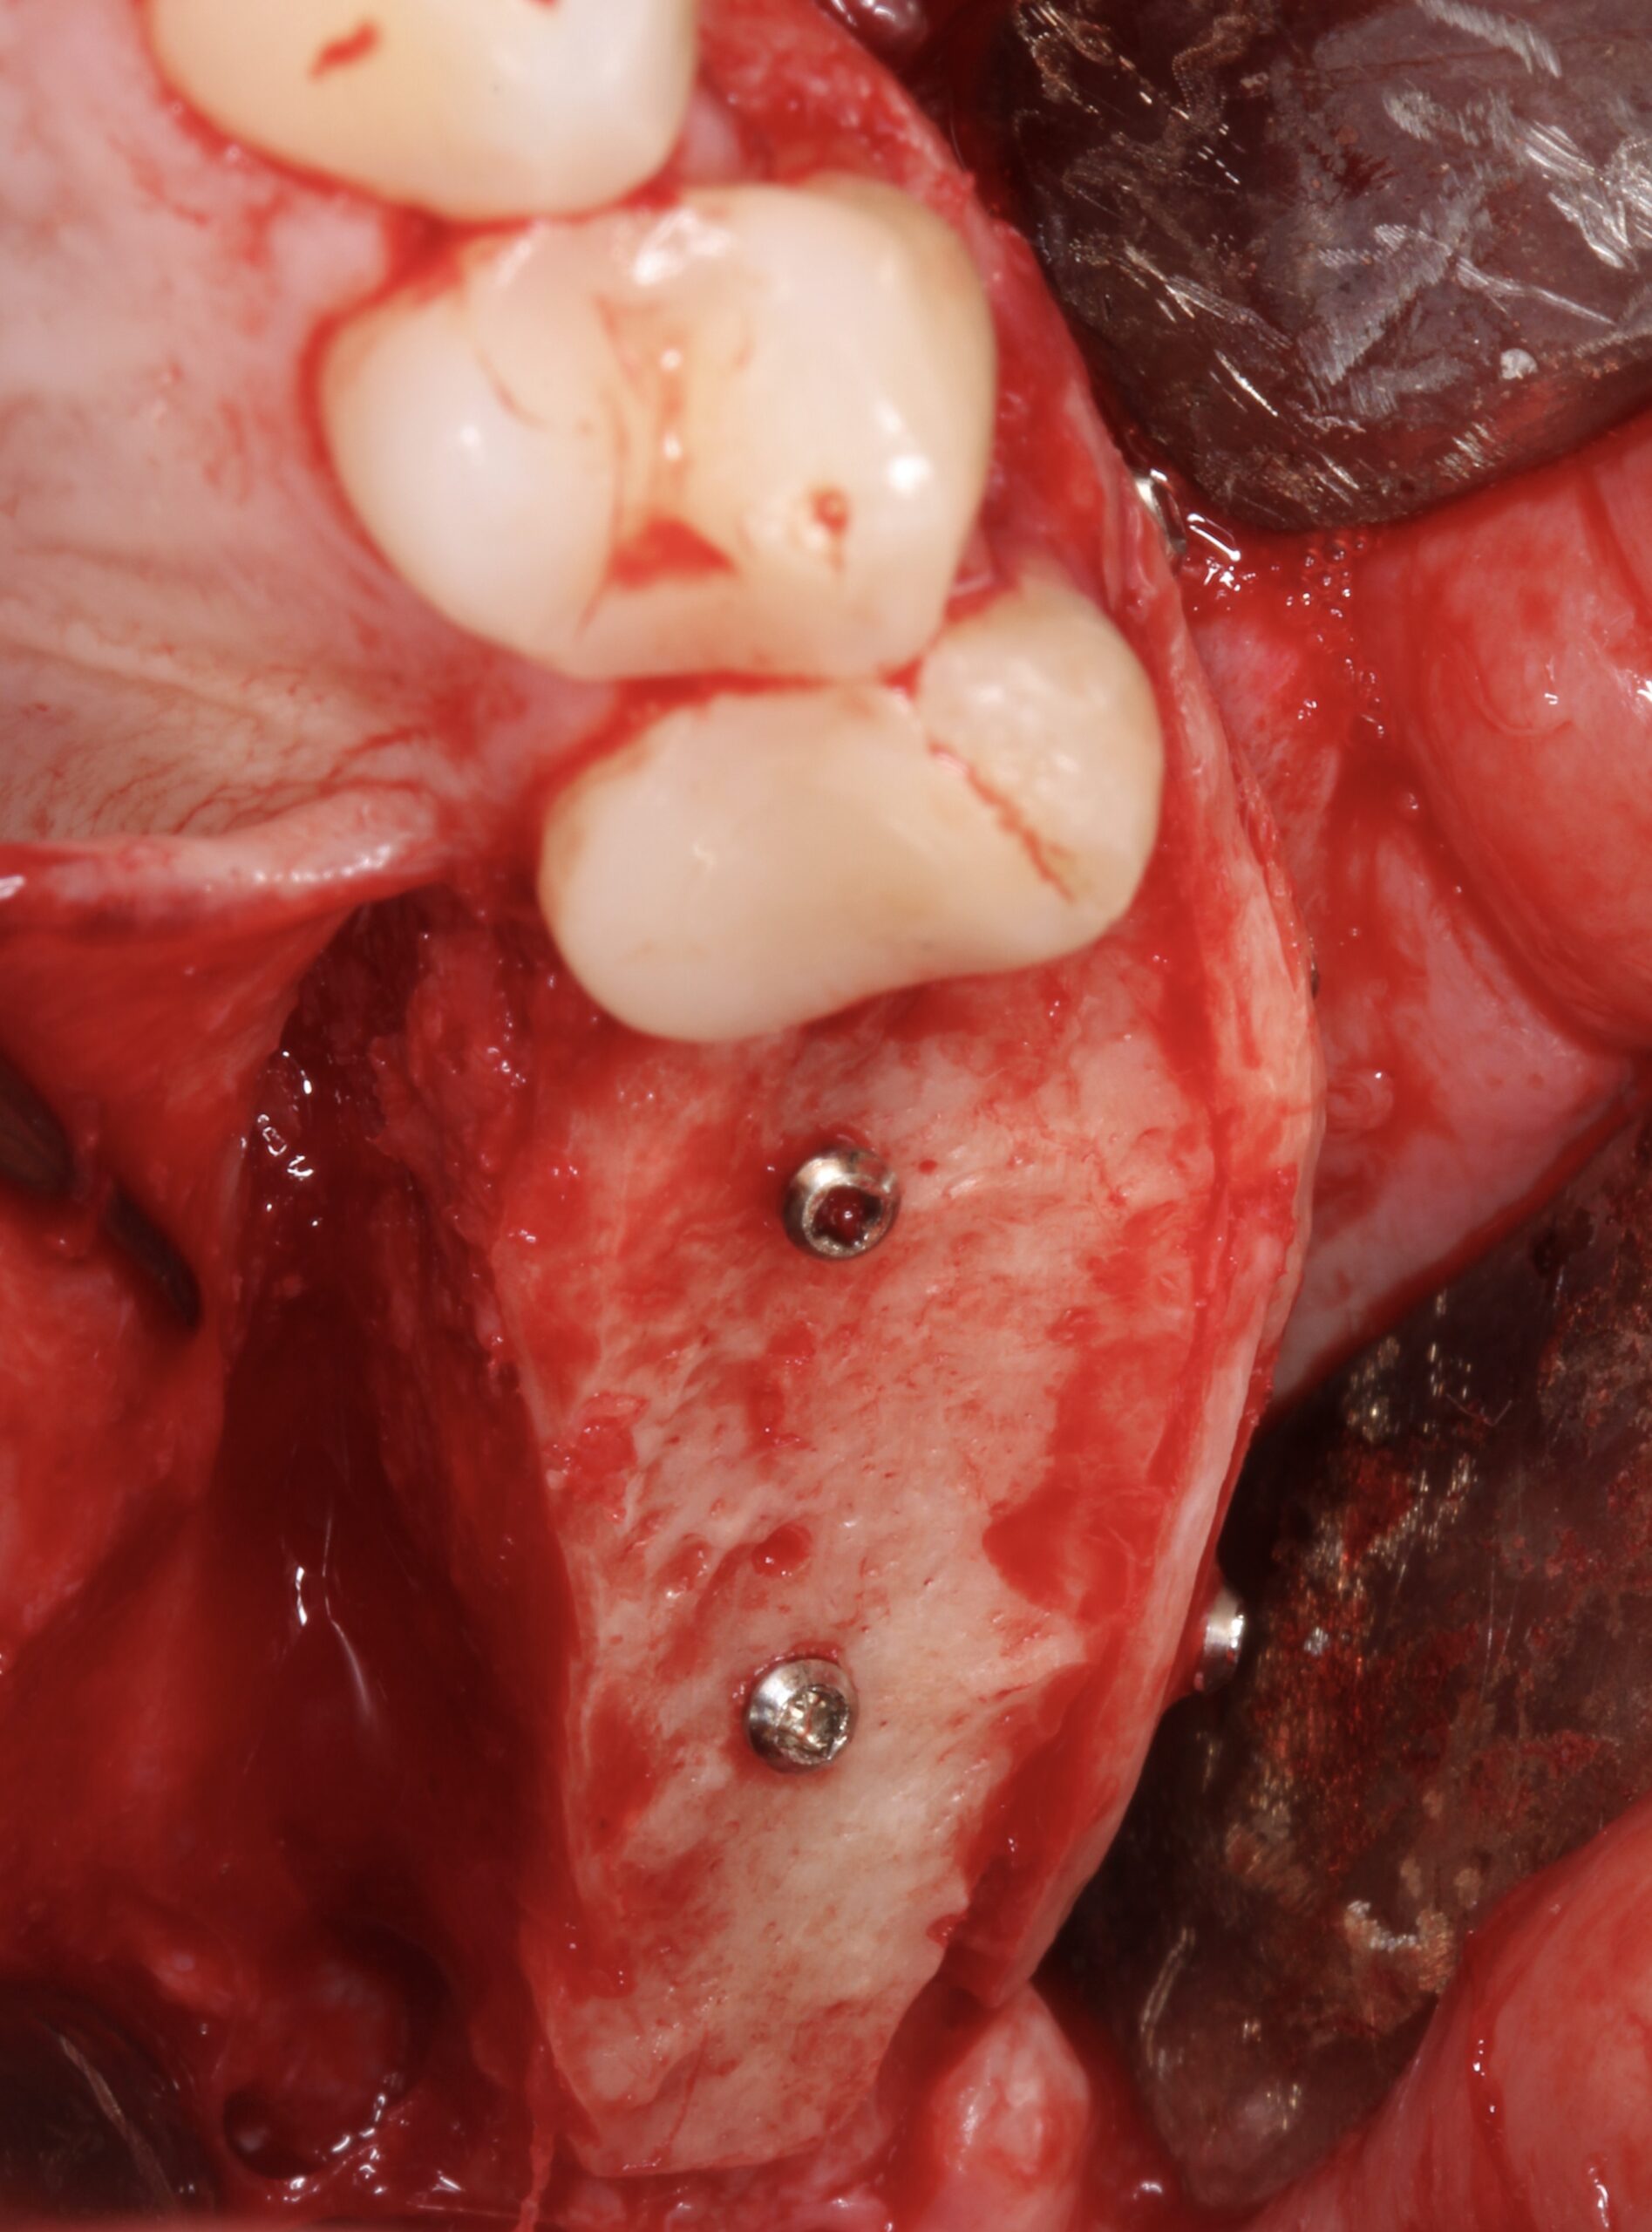
Figure 8.
Coronal view of the bone graft.
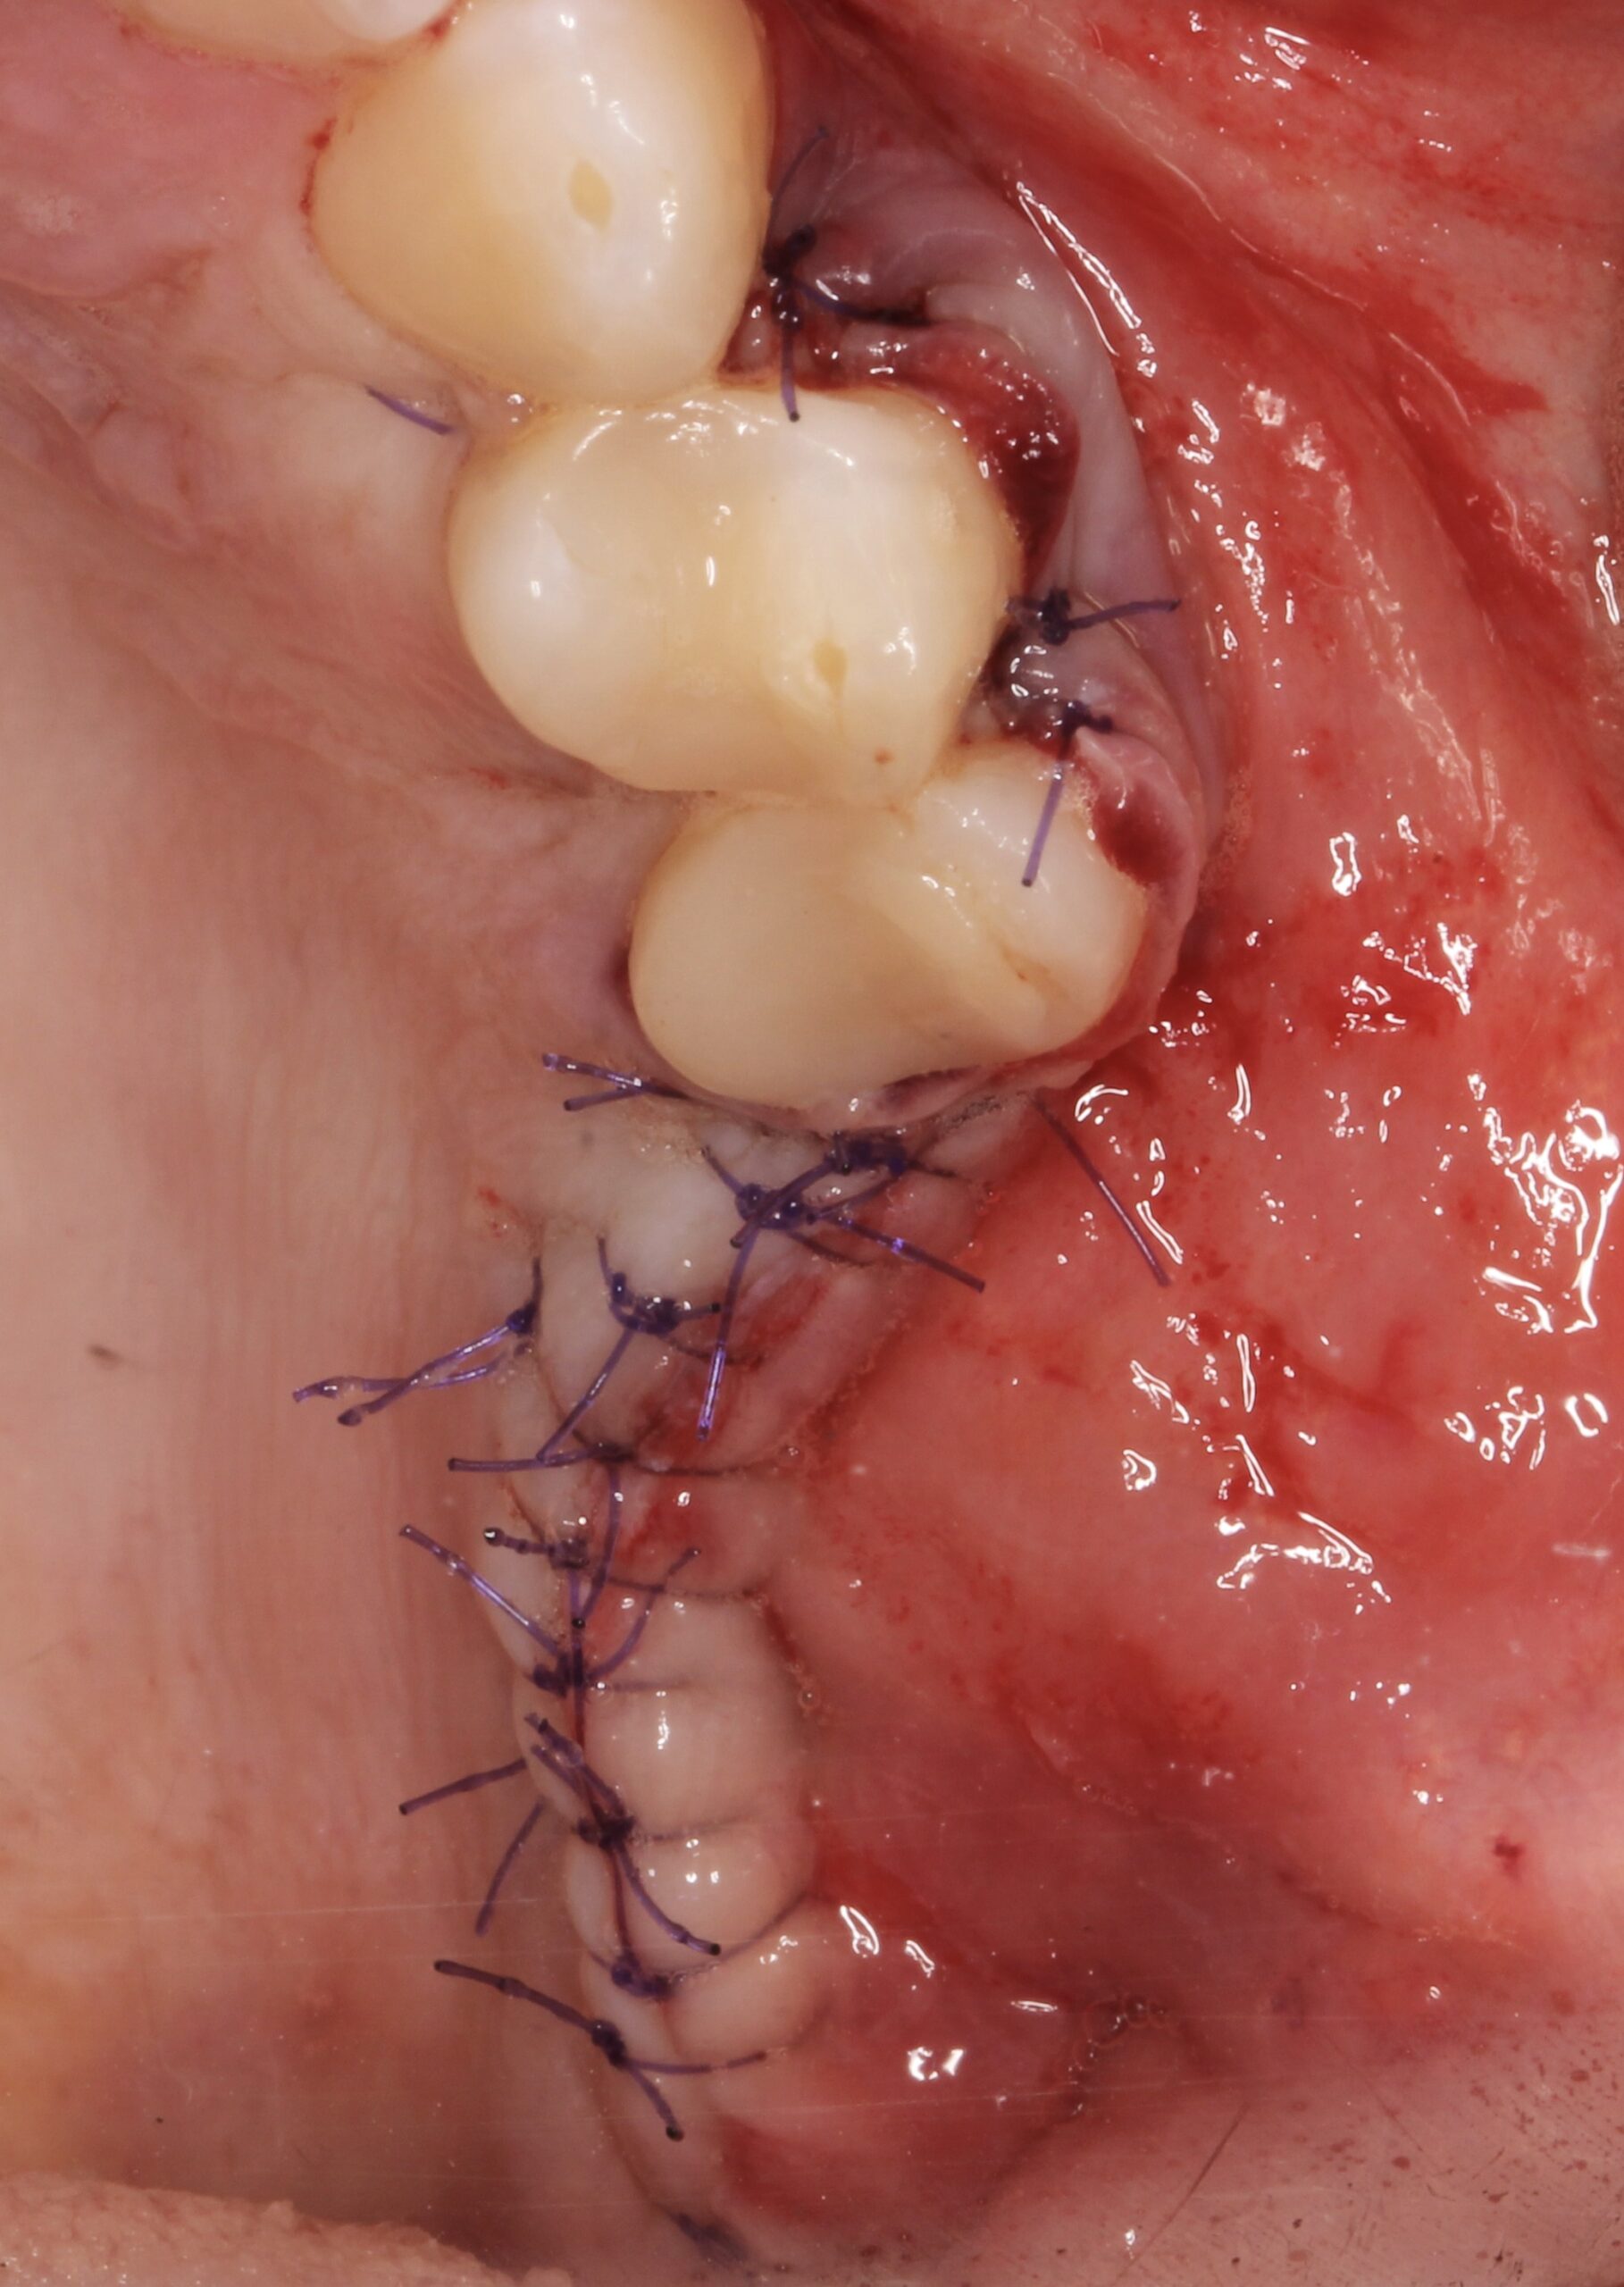
Figure 9.
Sutures.
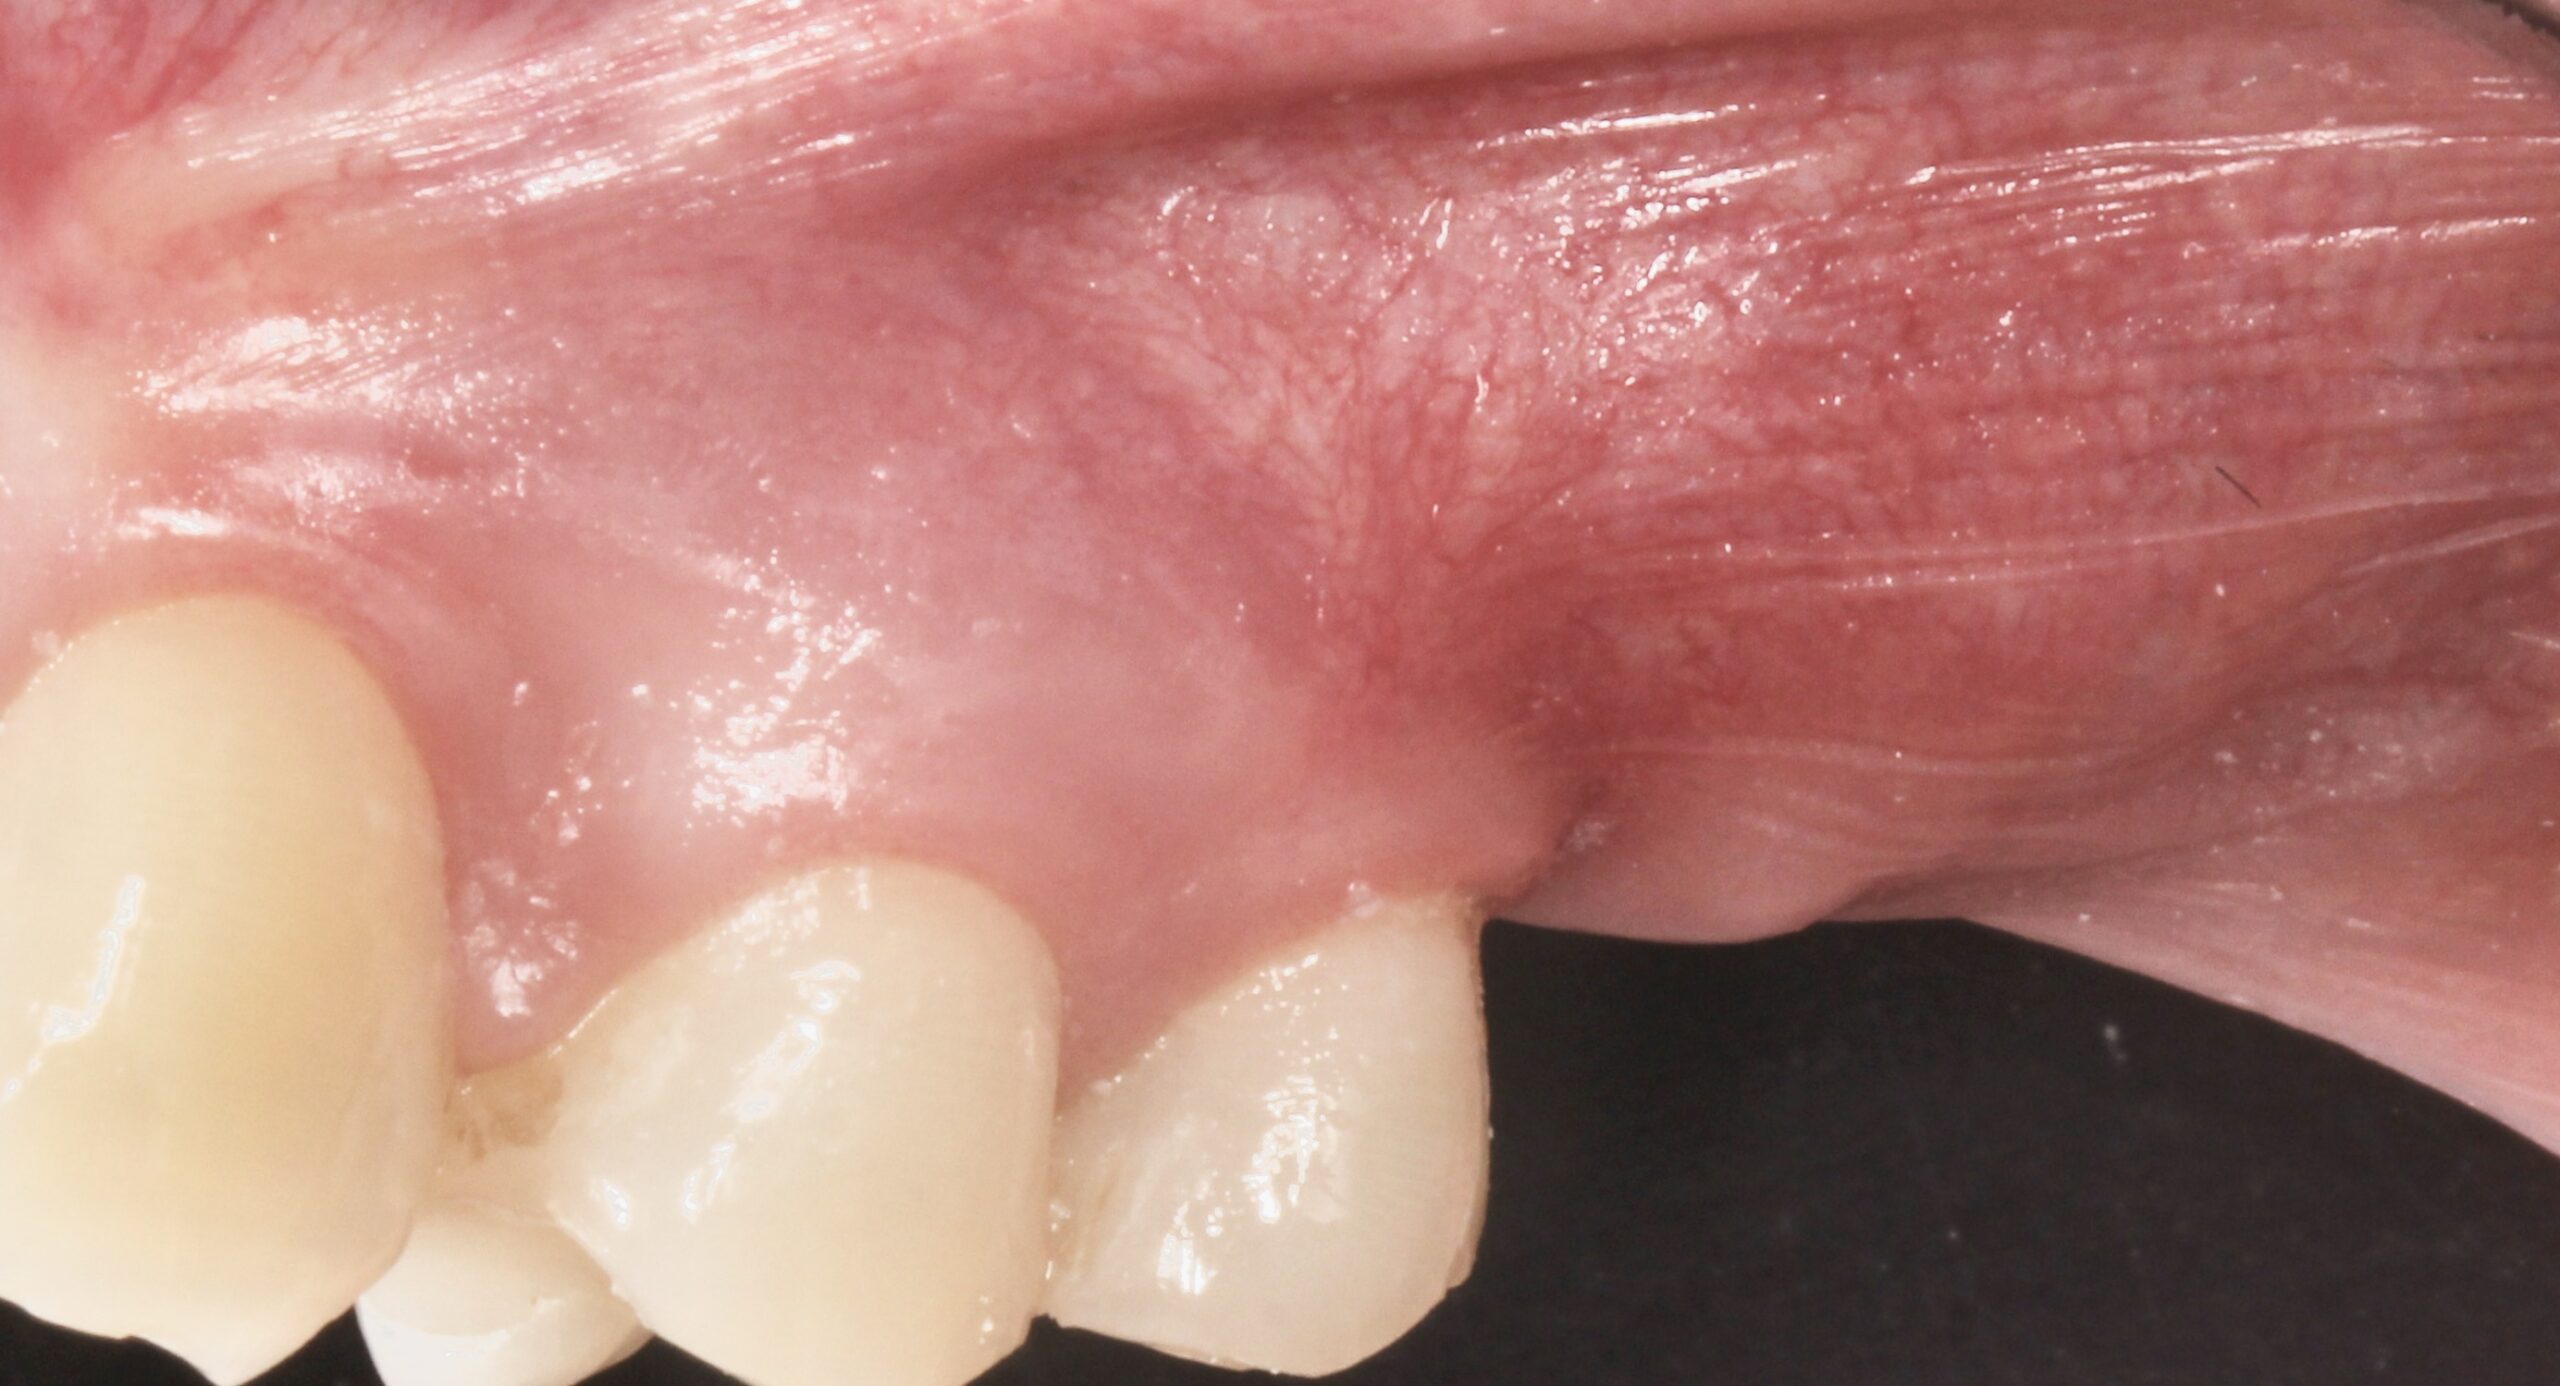
Figure 10.
After 4 months of healing reentry was carried out.
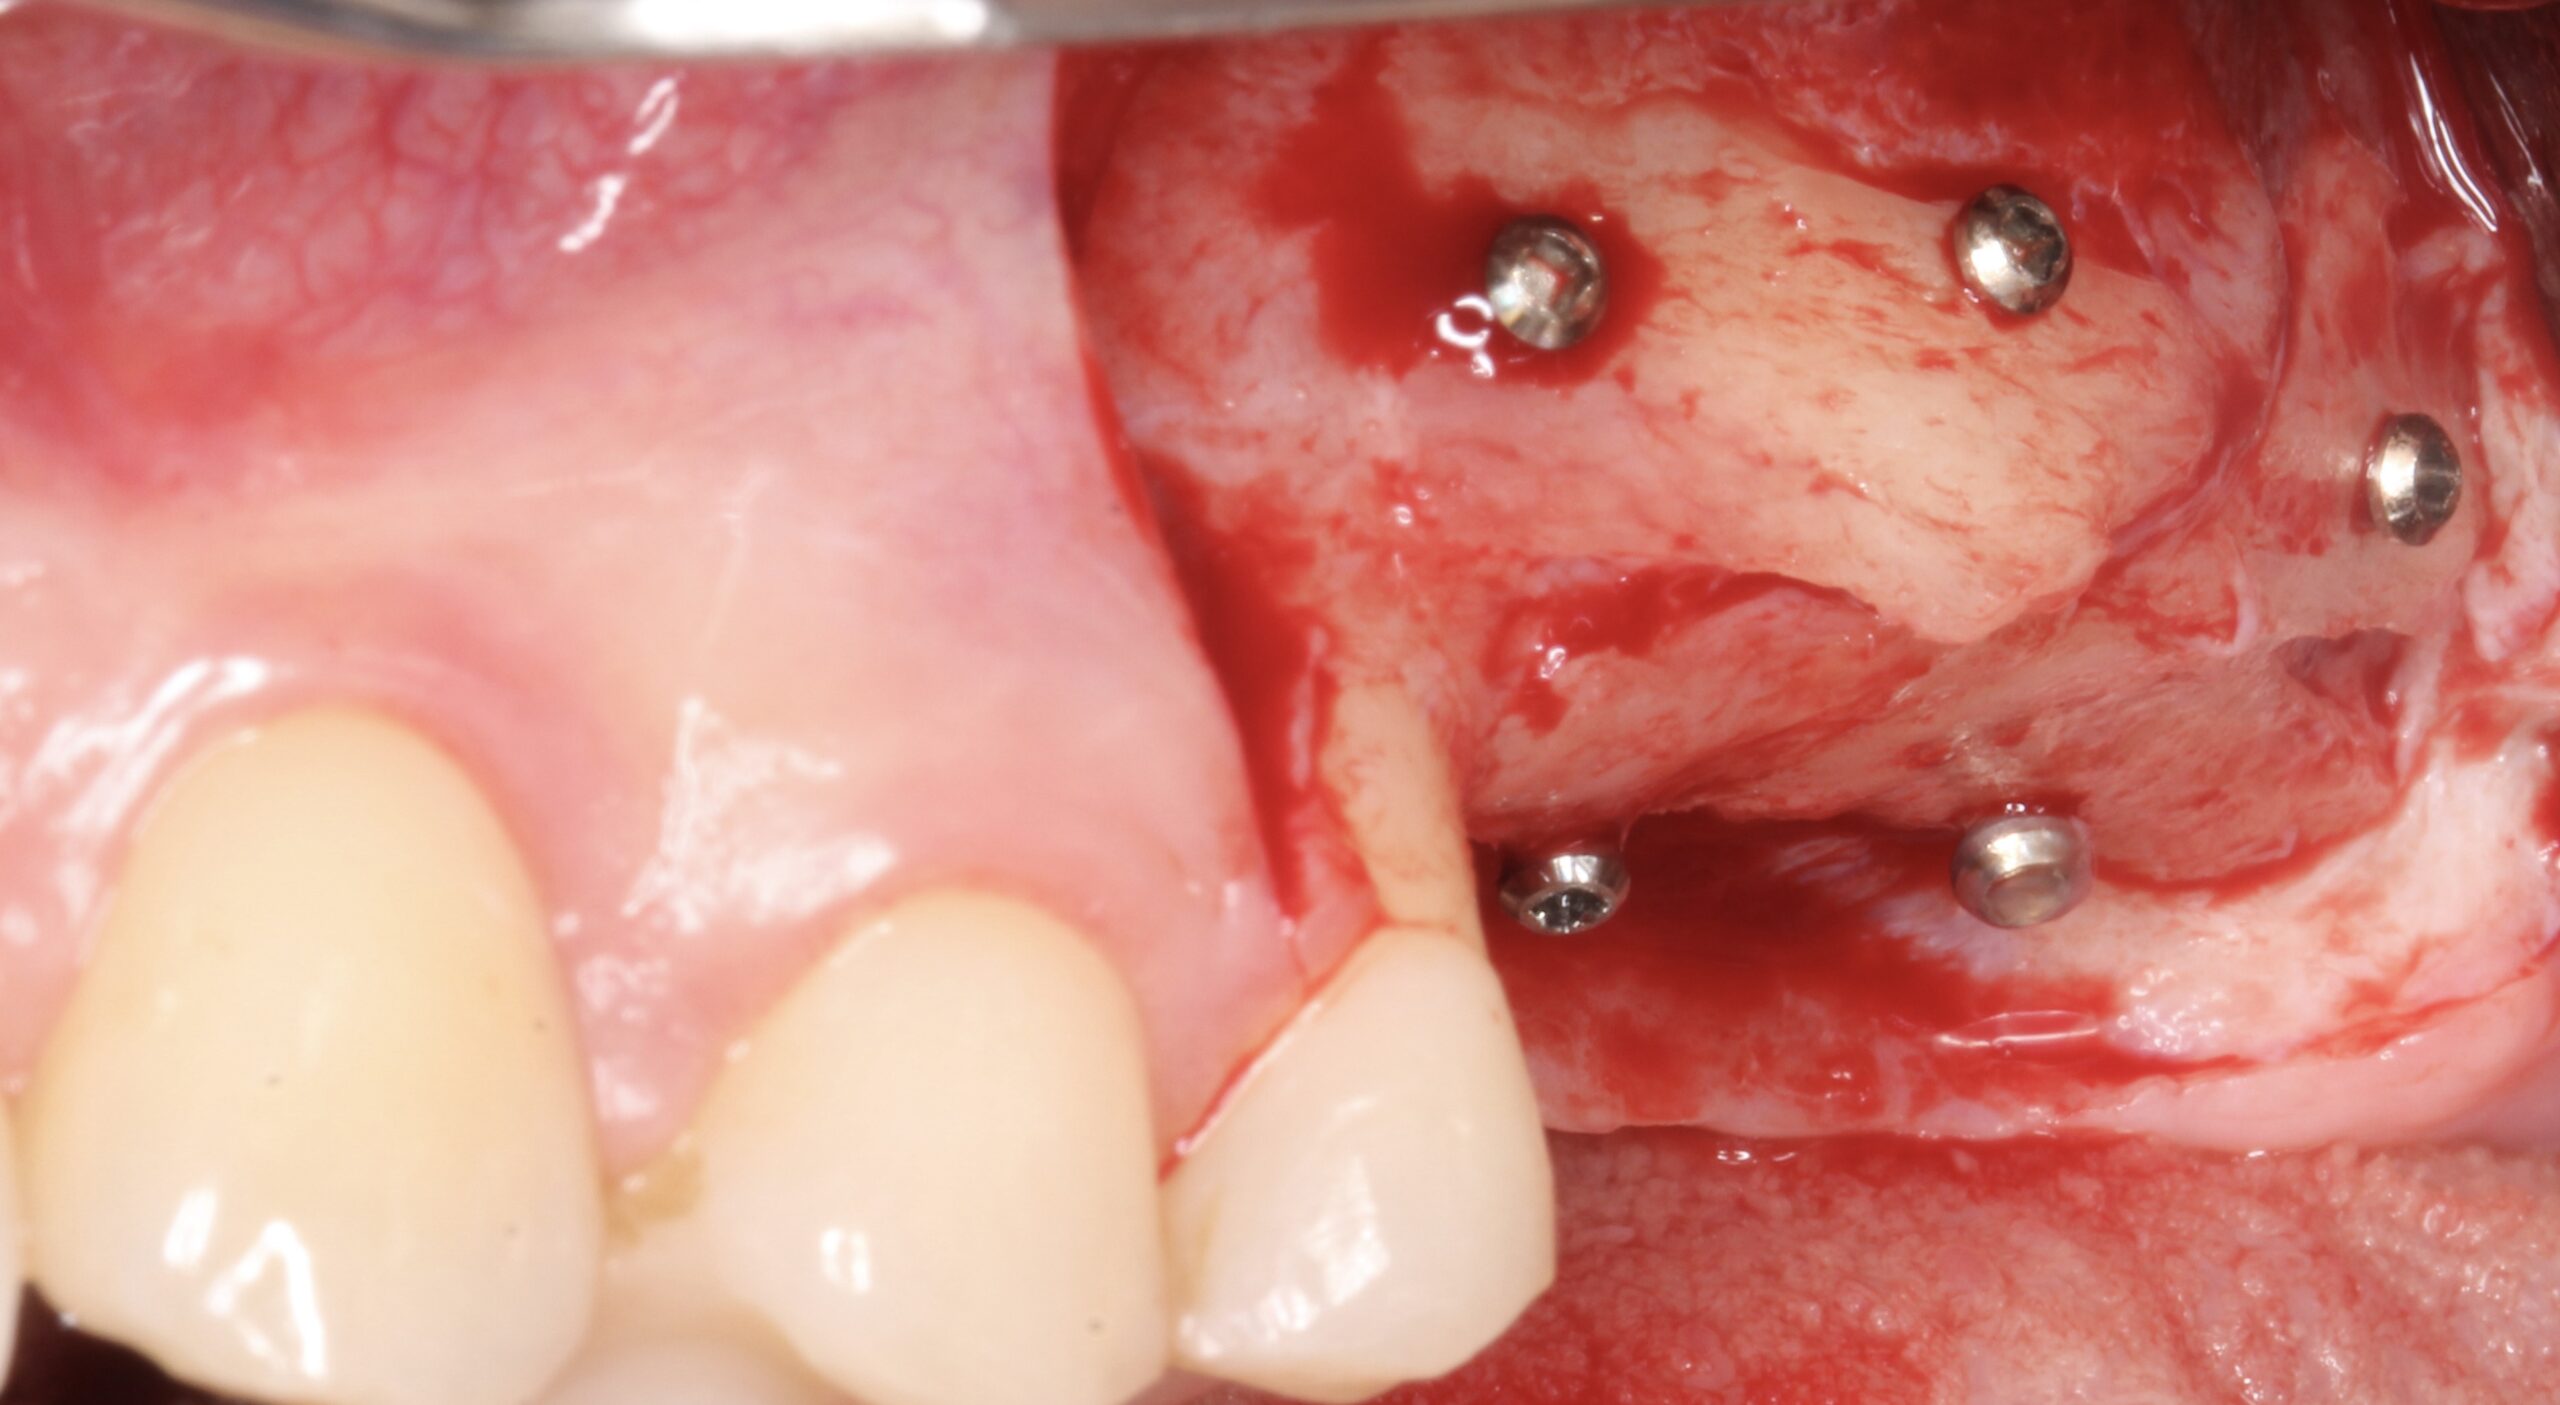
Figure 11.
Lateral view showing complete bone regeneration.
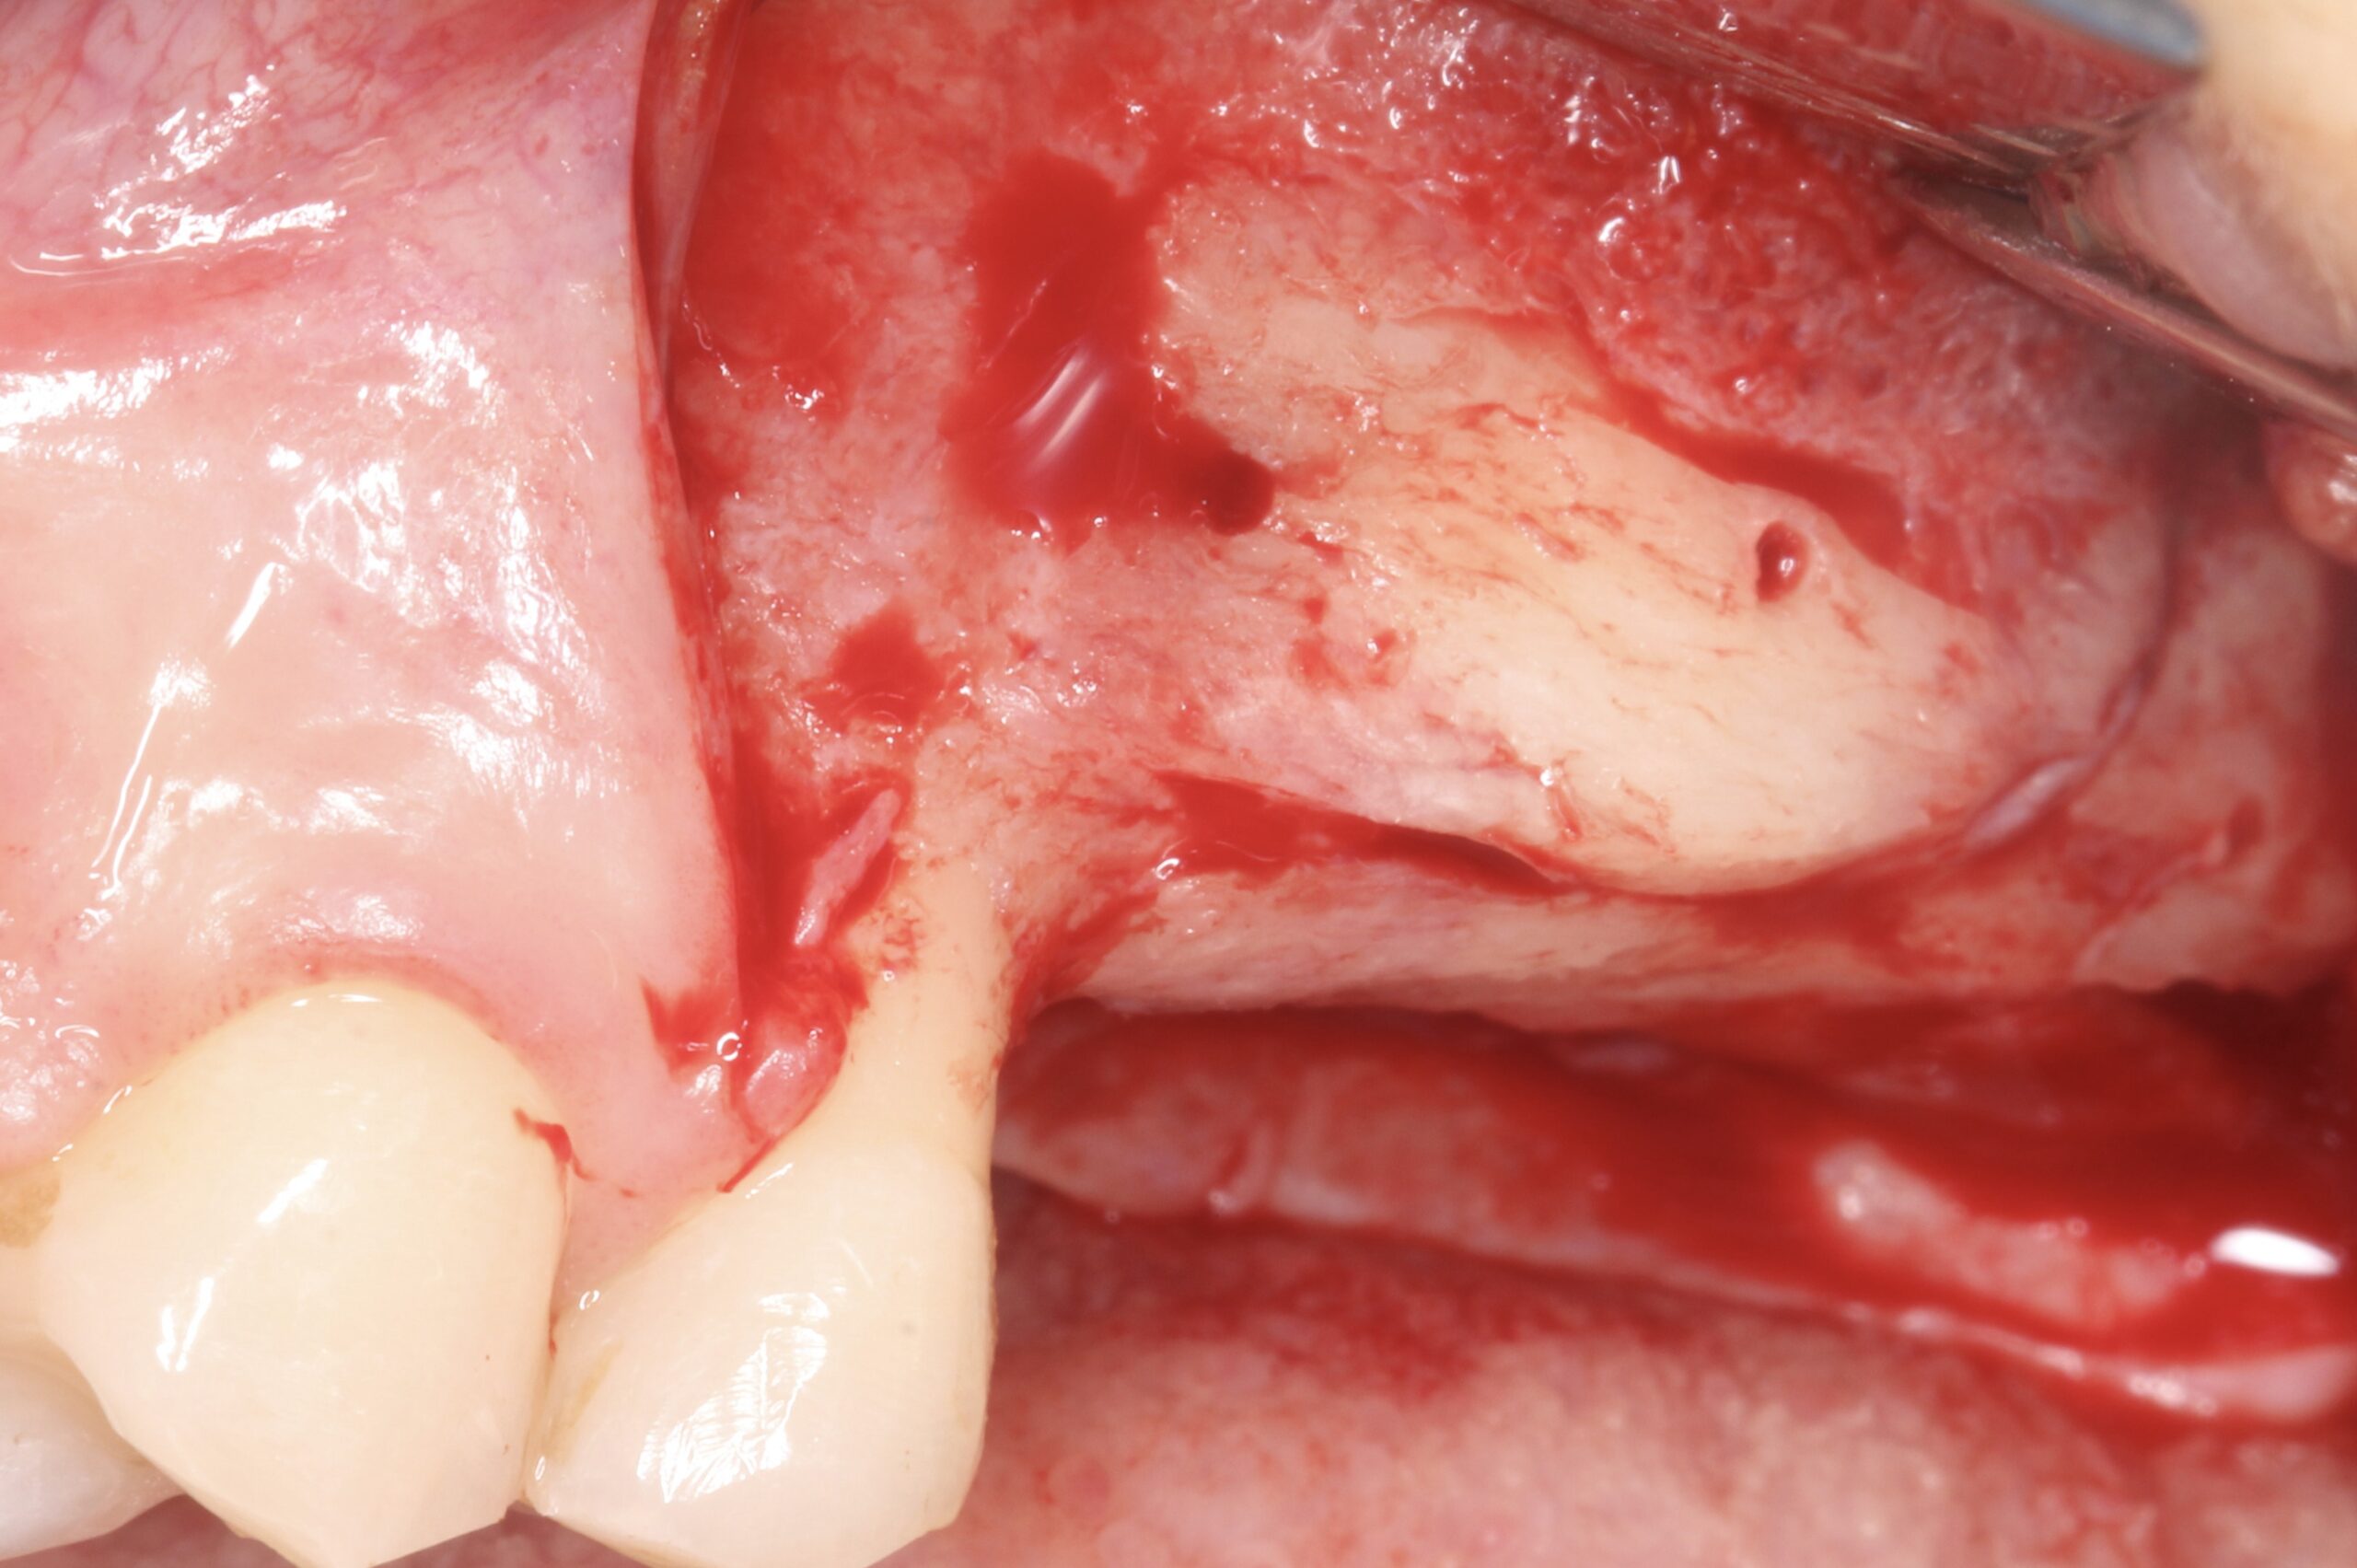
Figure 12.
Complete vertical bone regeneration
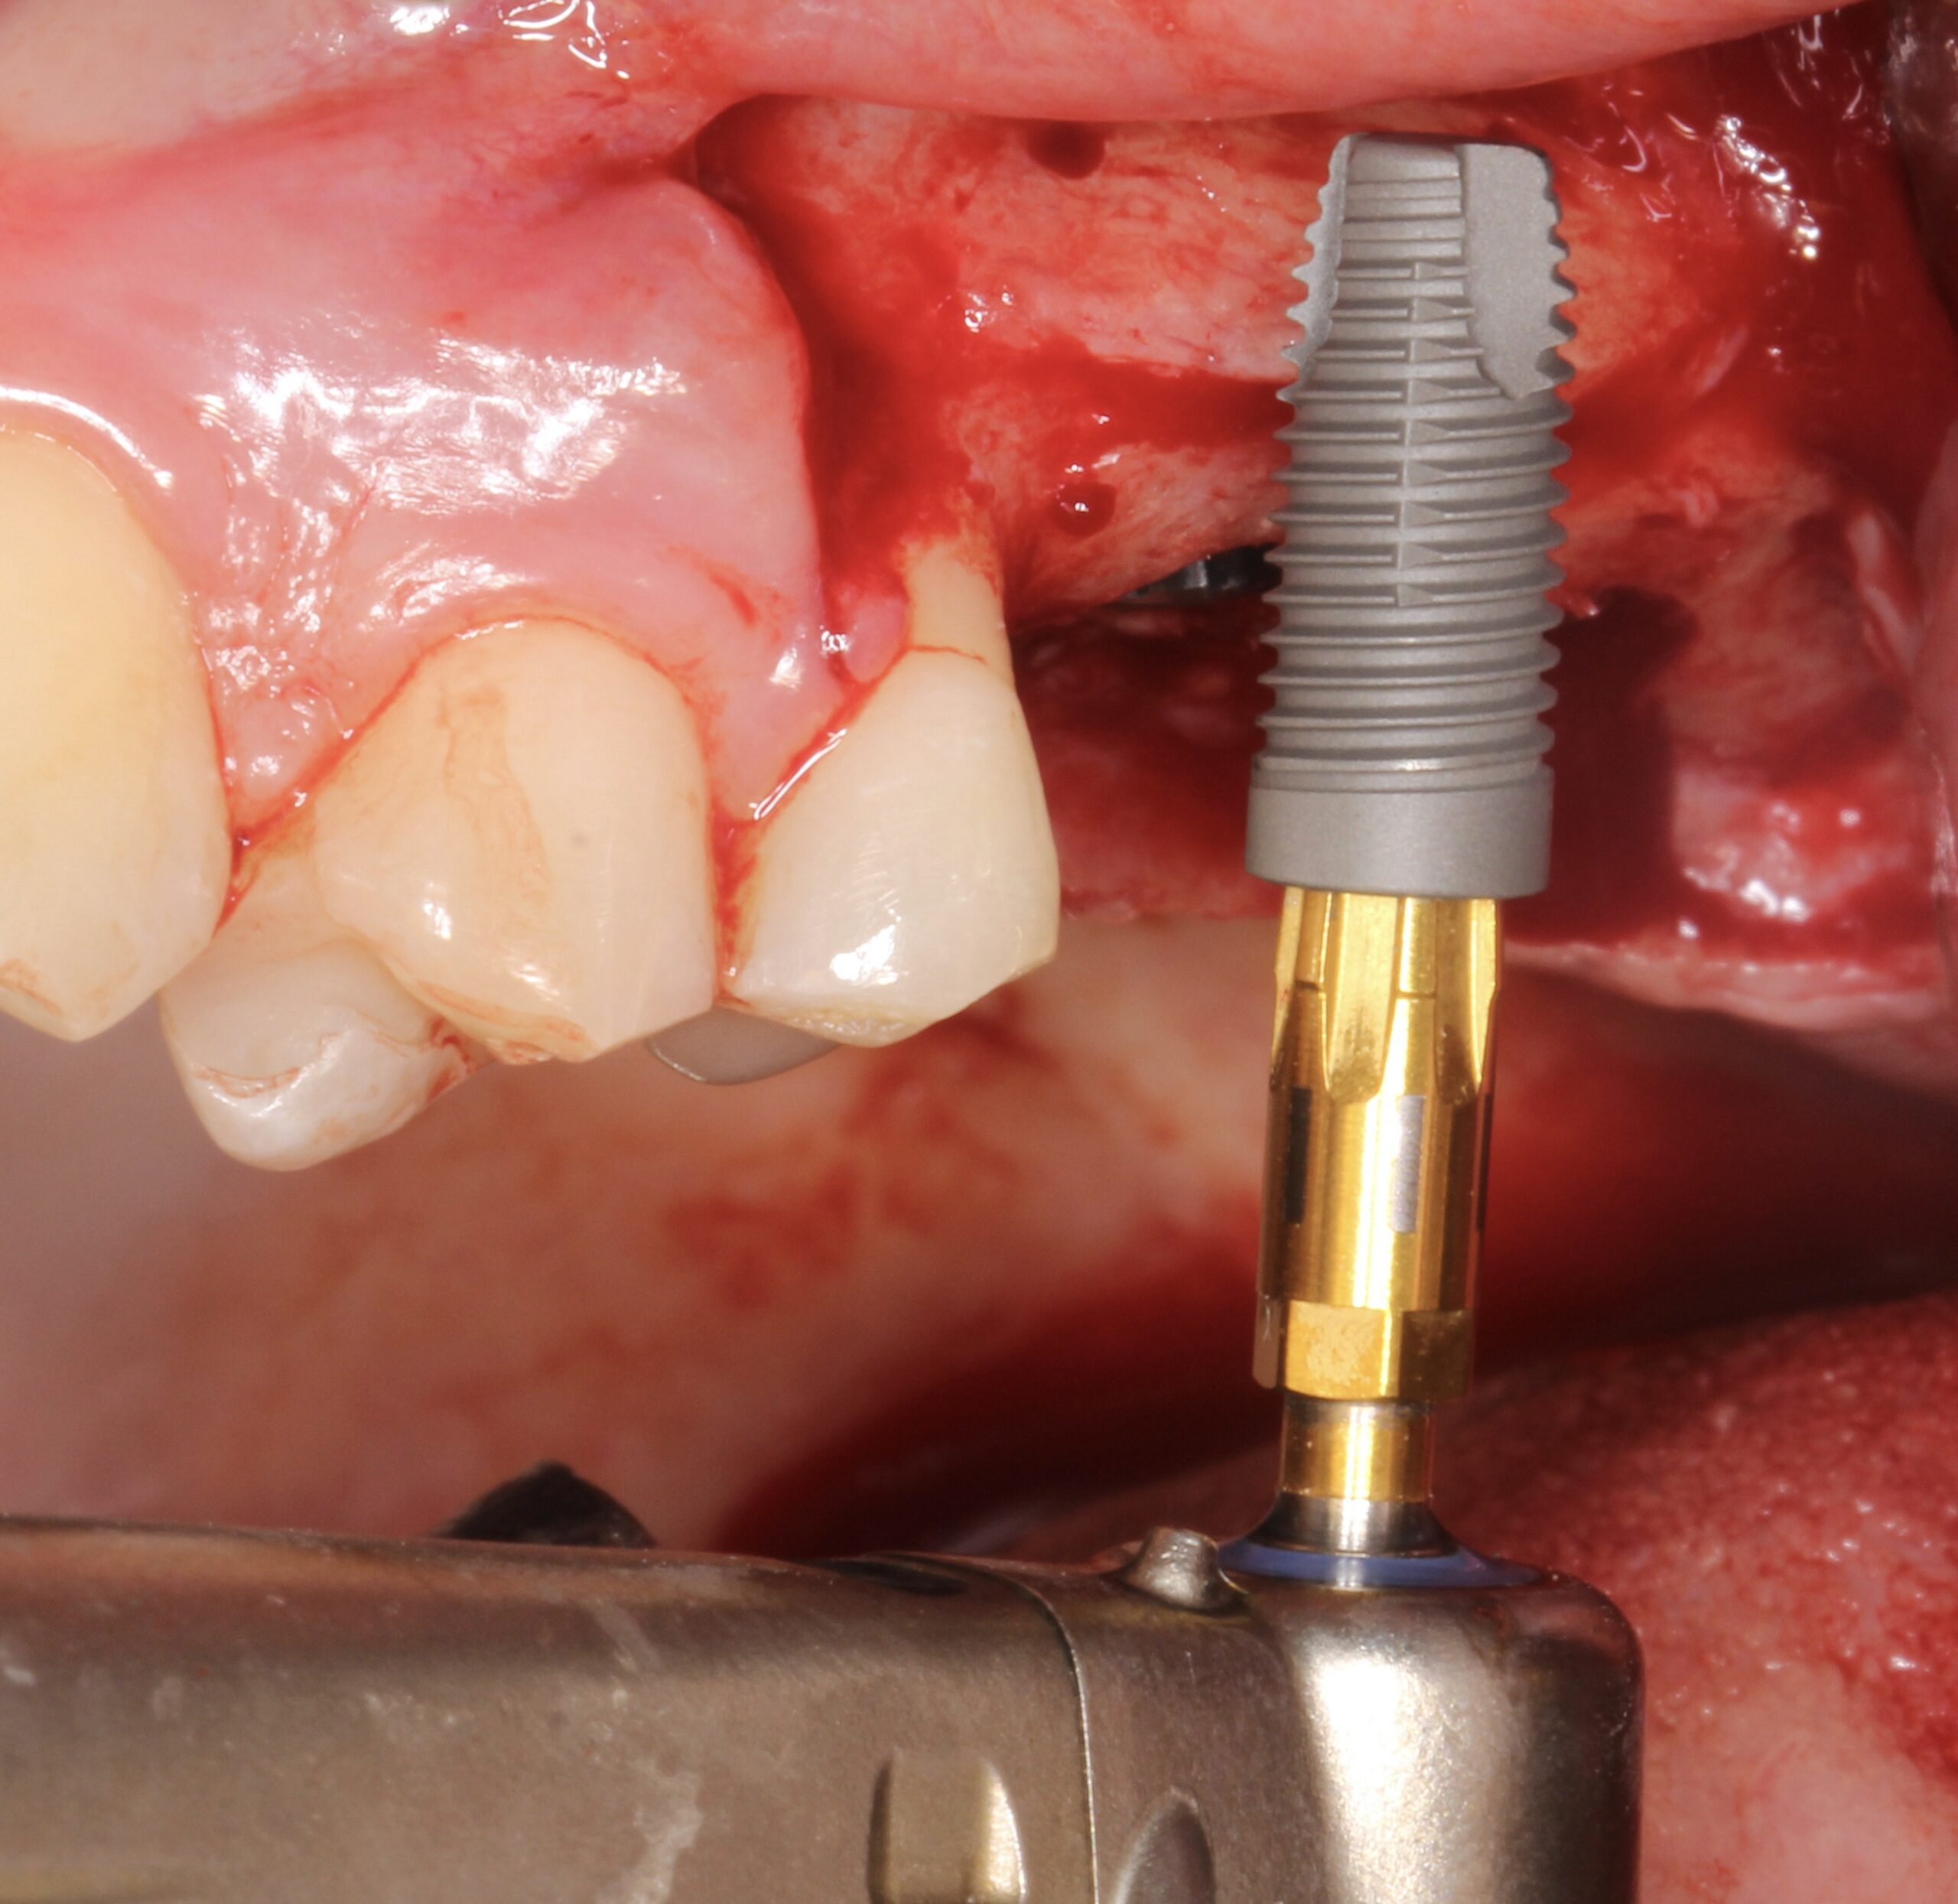
Figure 13.
2 Neoss ProActive® Straight implants (4.5 x 11 mm) were placed.
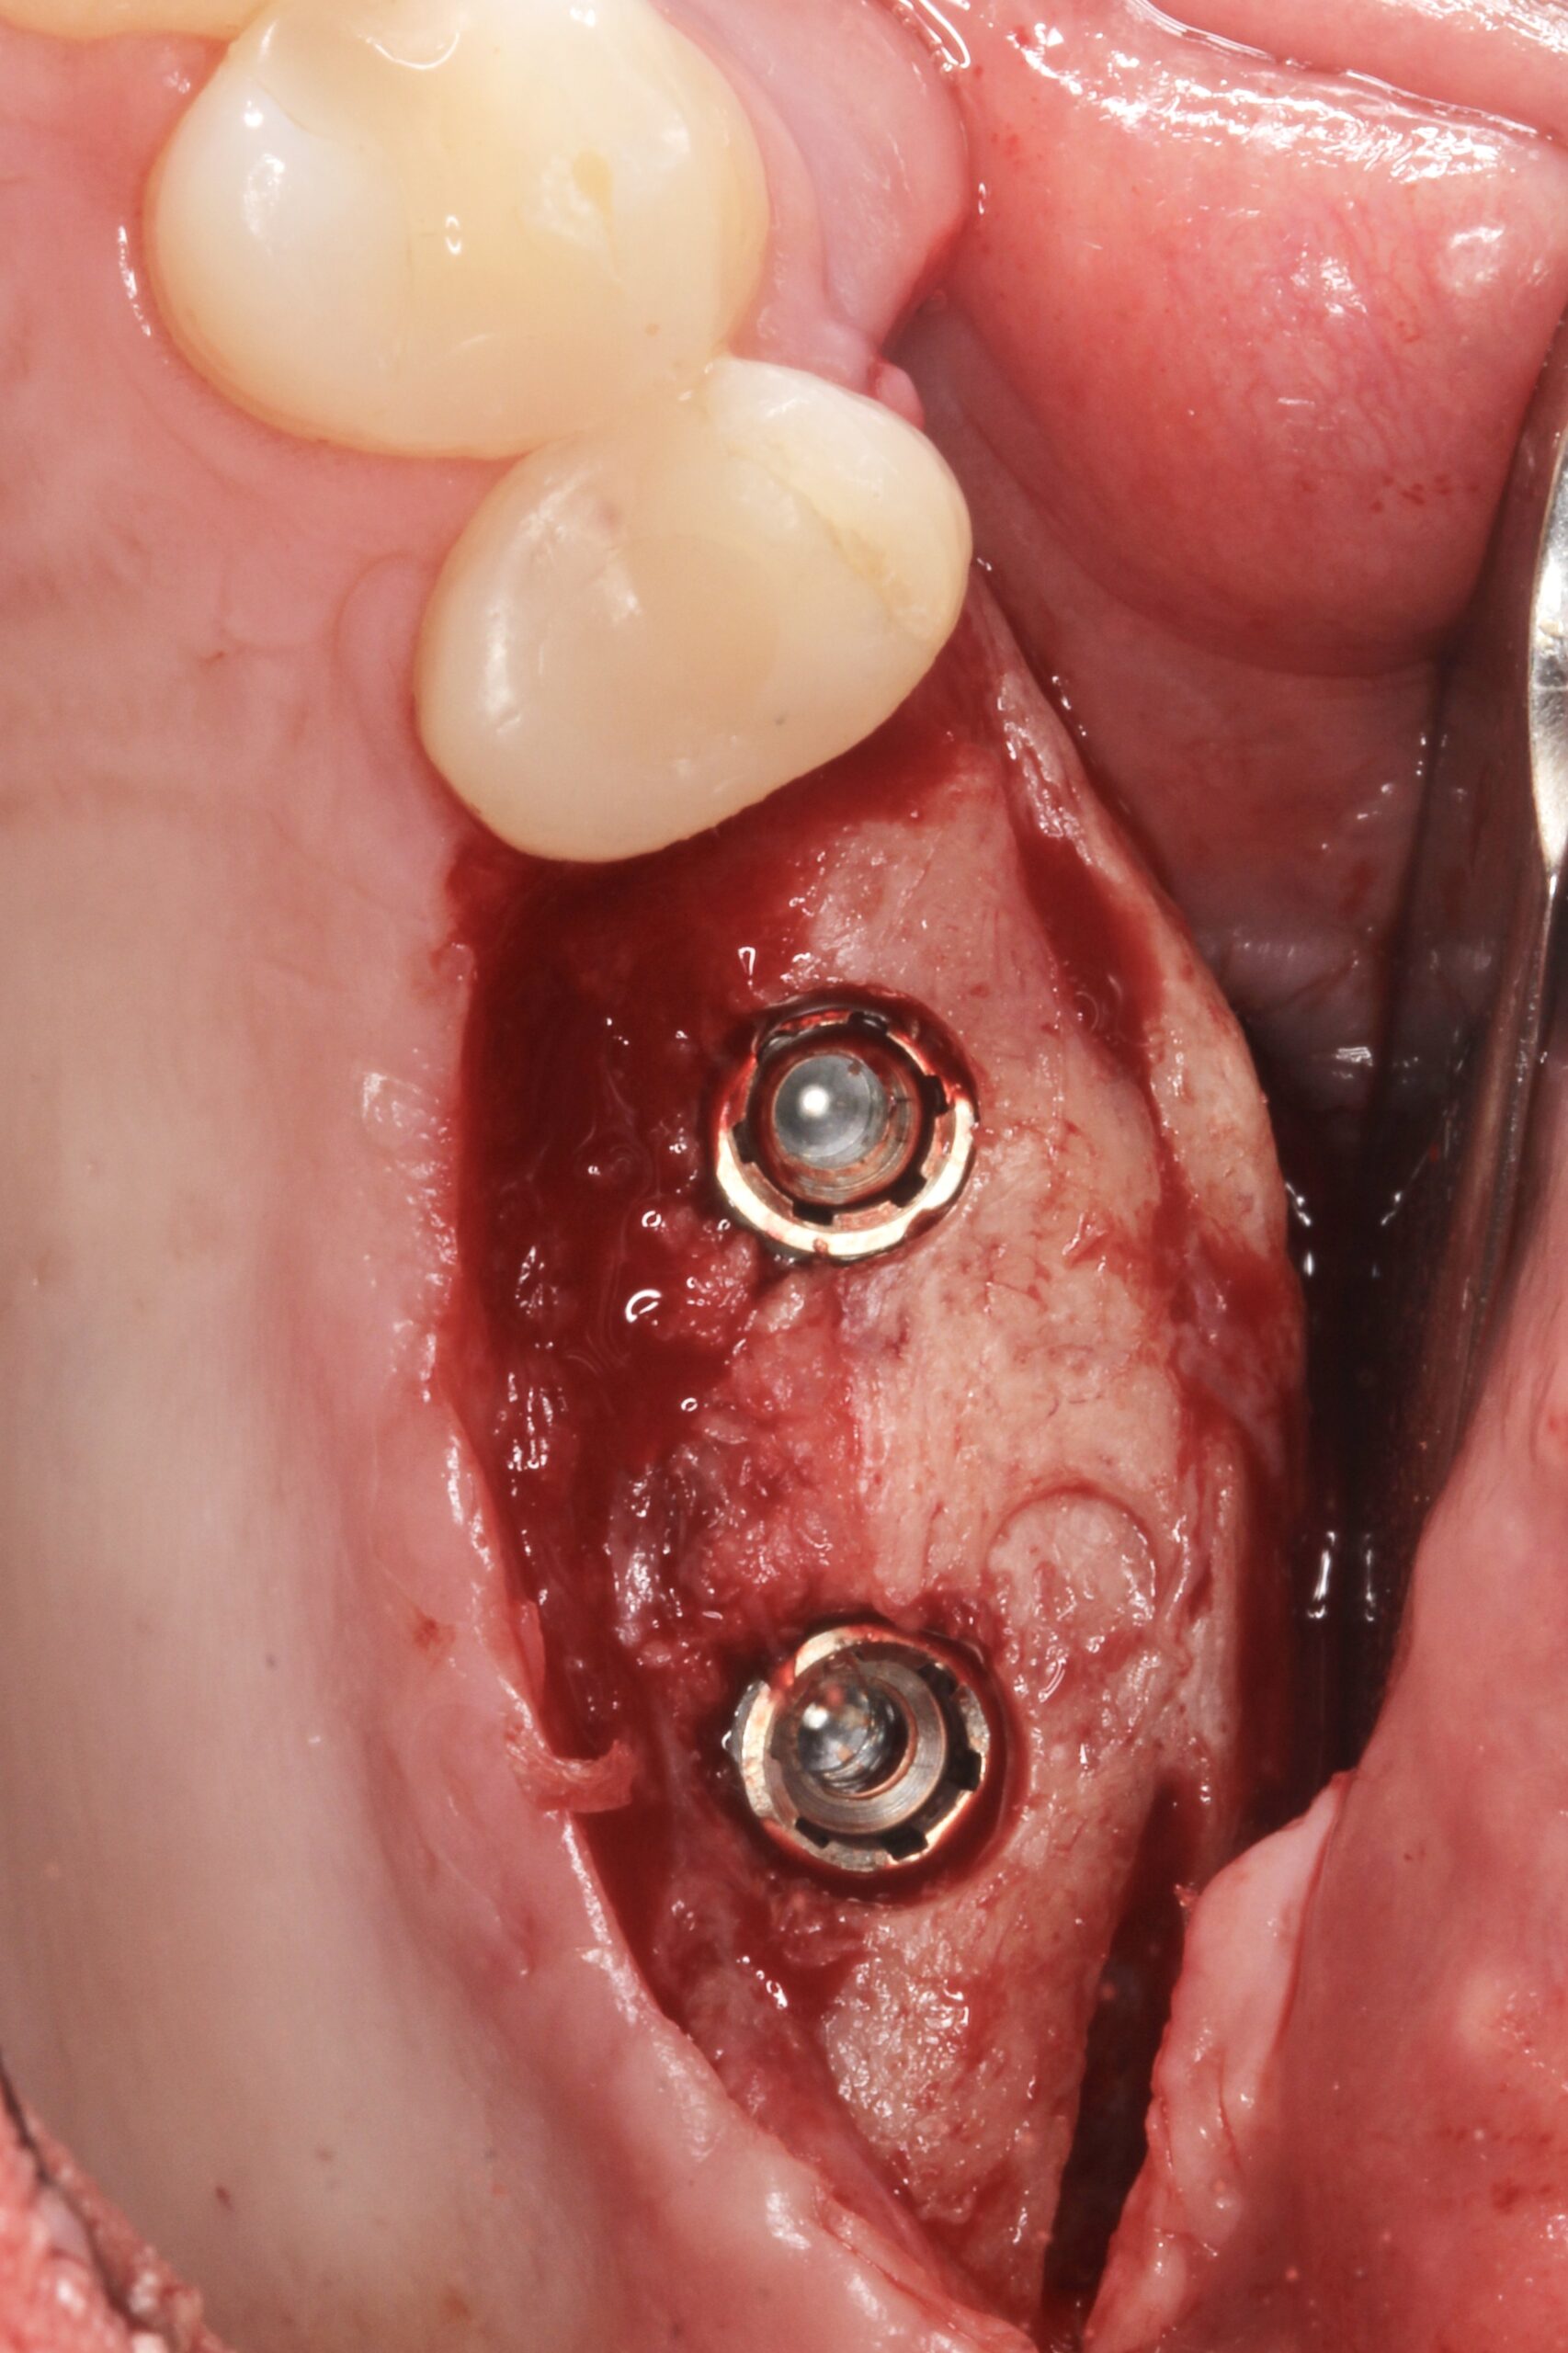
Figure 14.
Occlusal view of the implants.
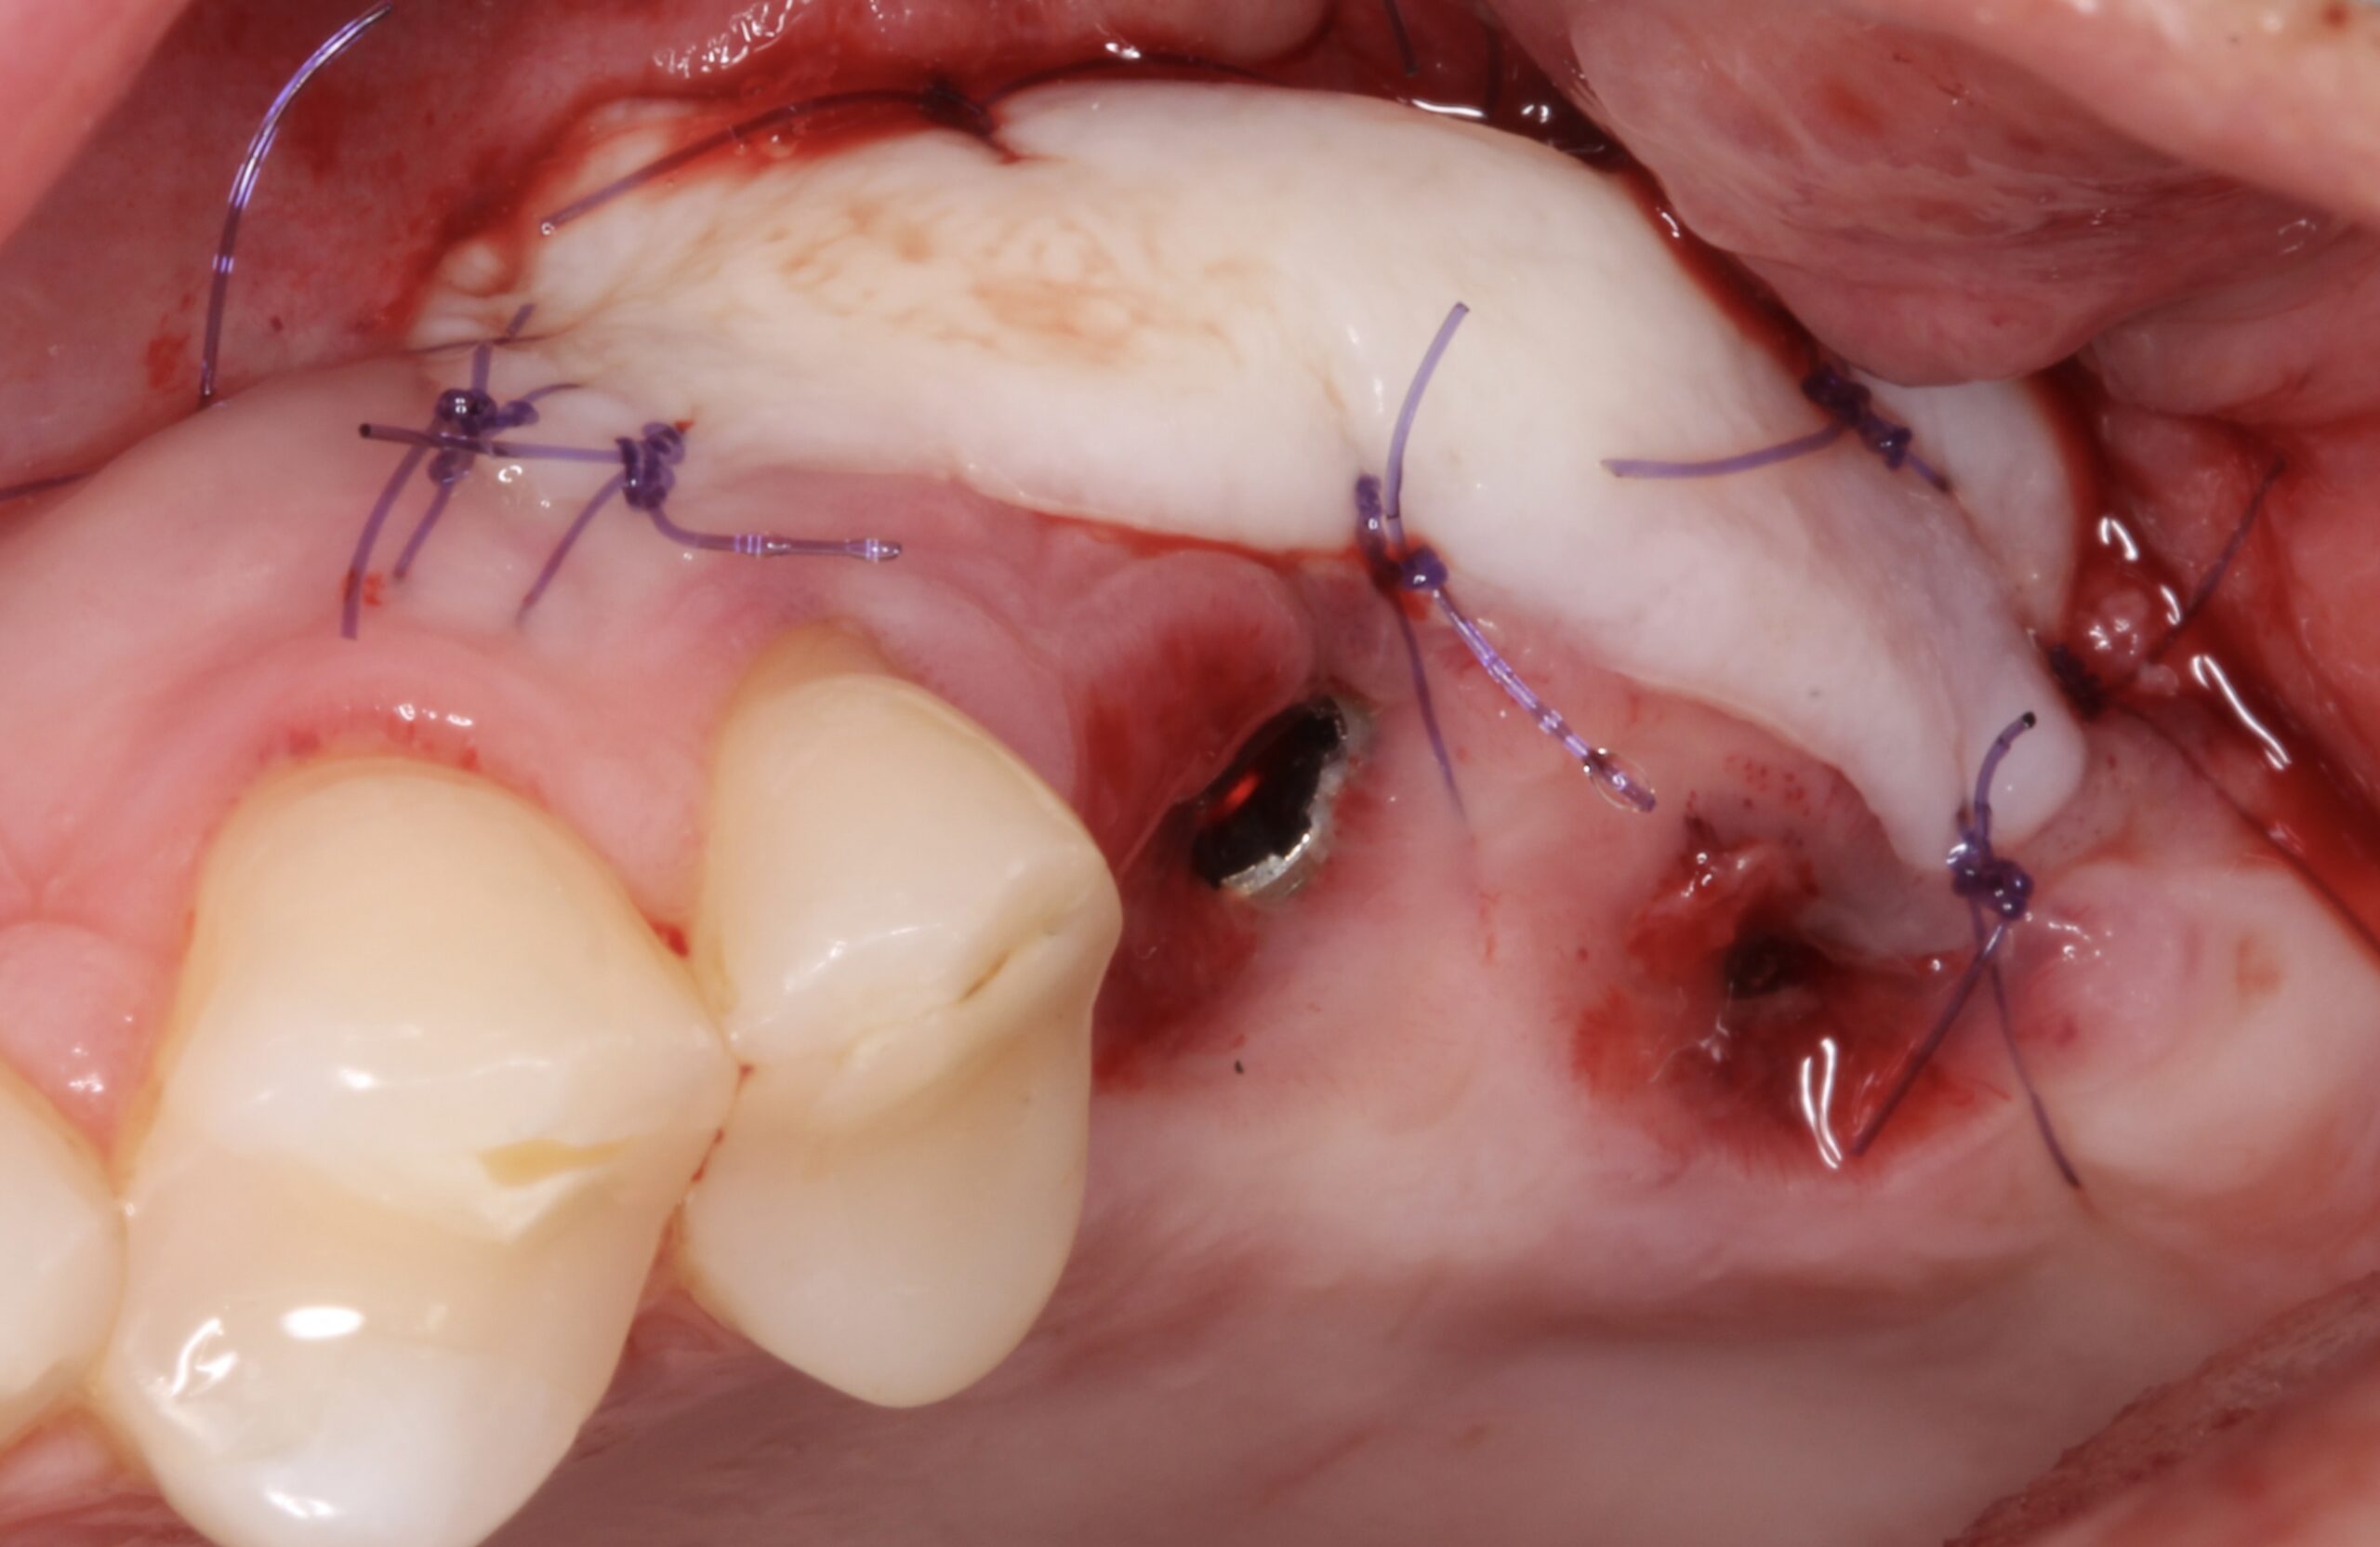
Figure 15.
2 months later a Free Gingival Graft was placed to reposition the mucogingival line.
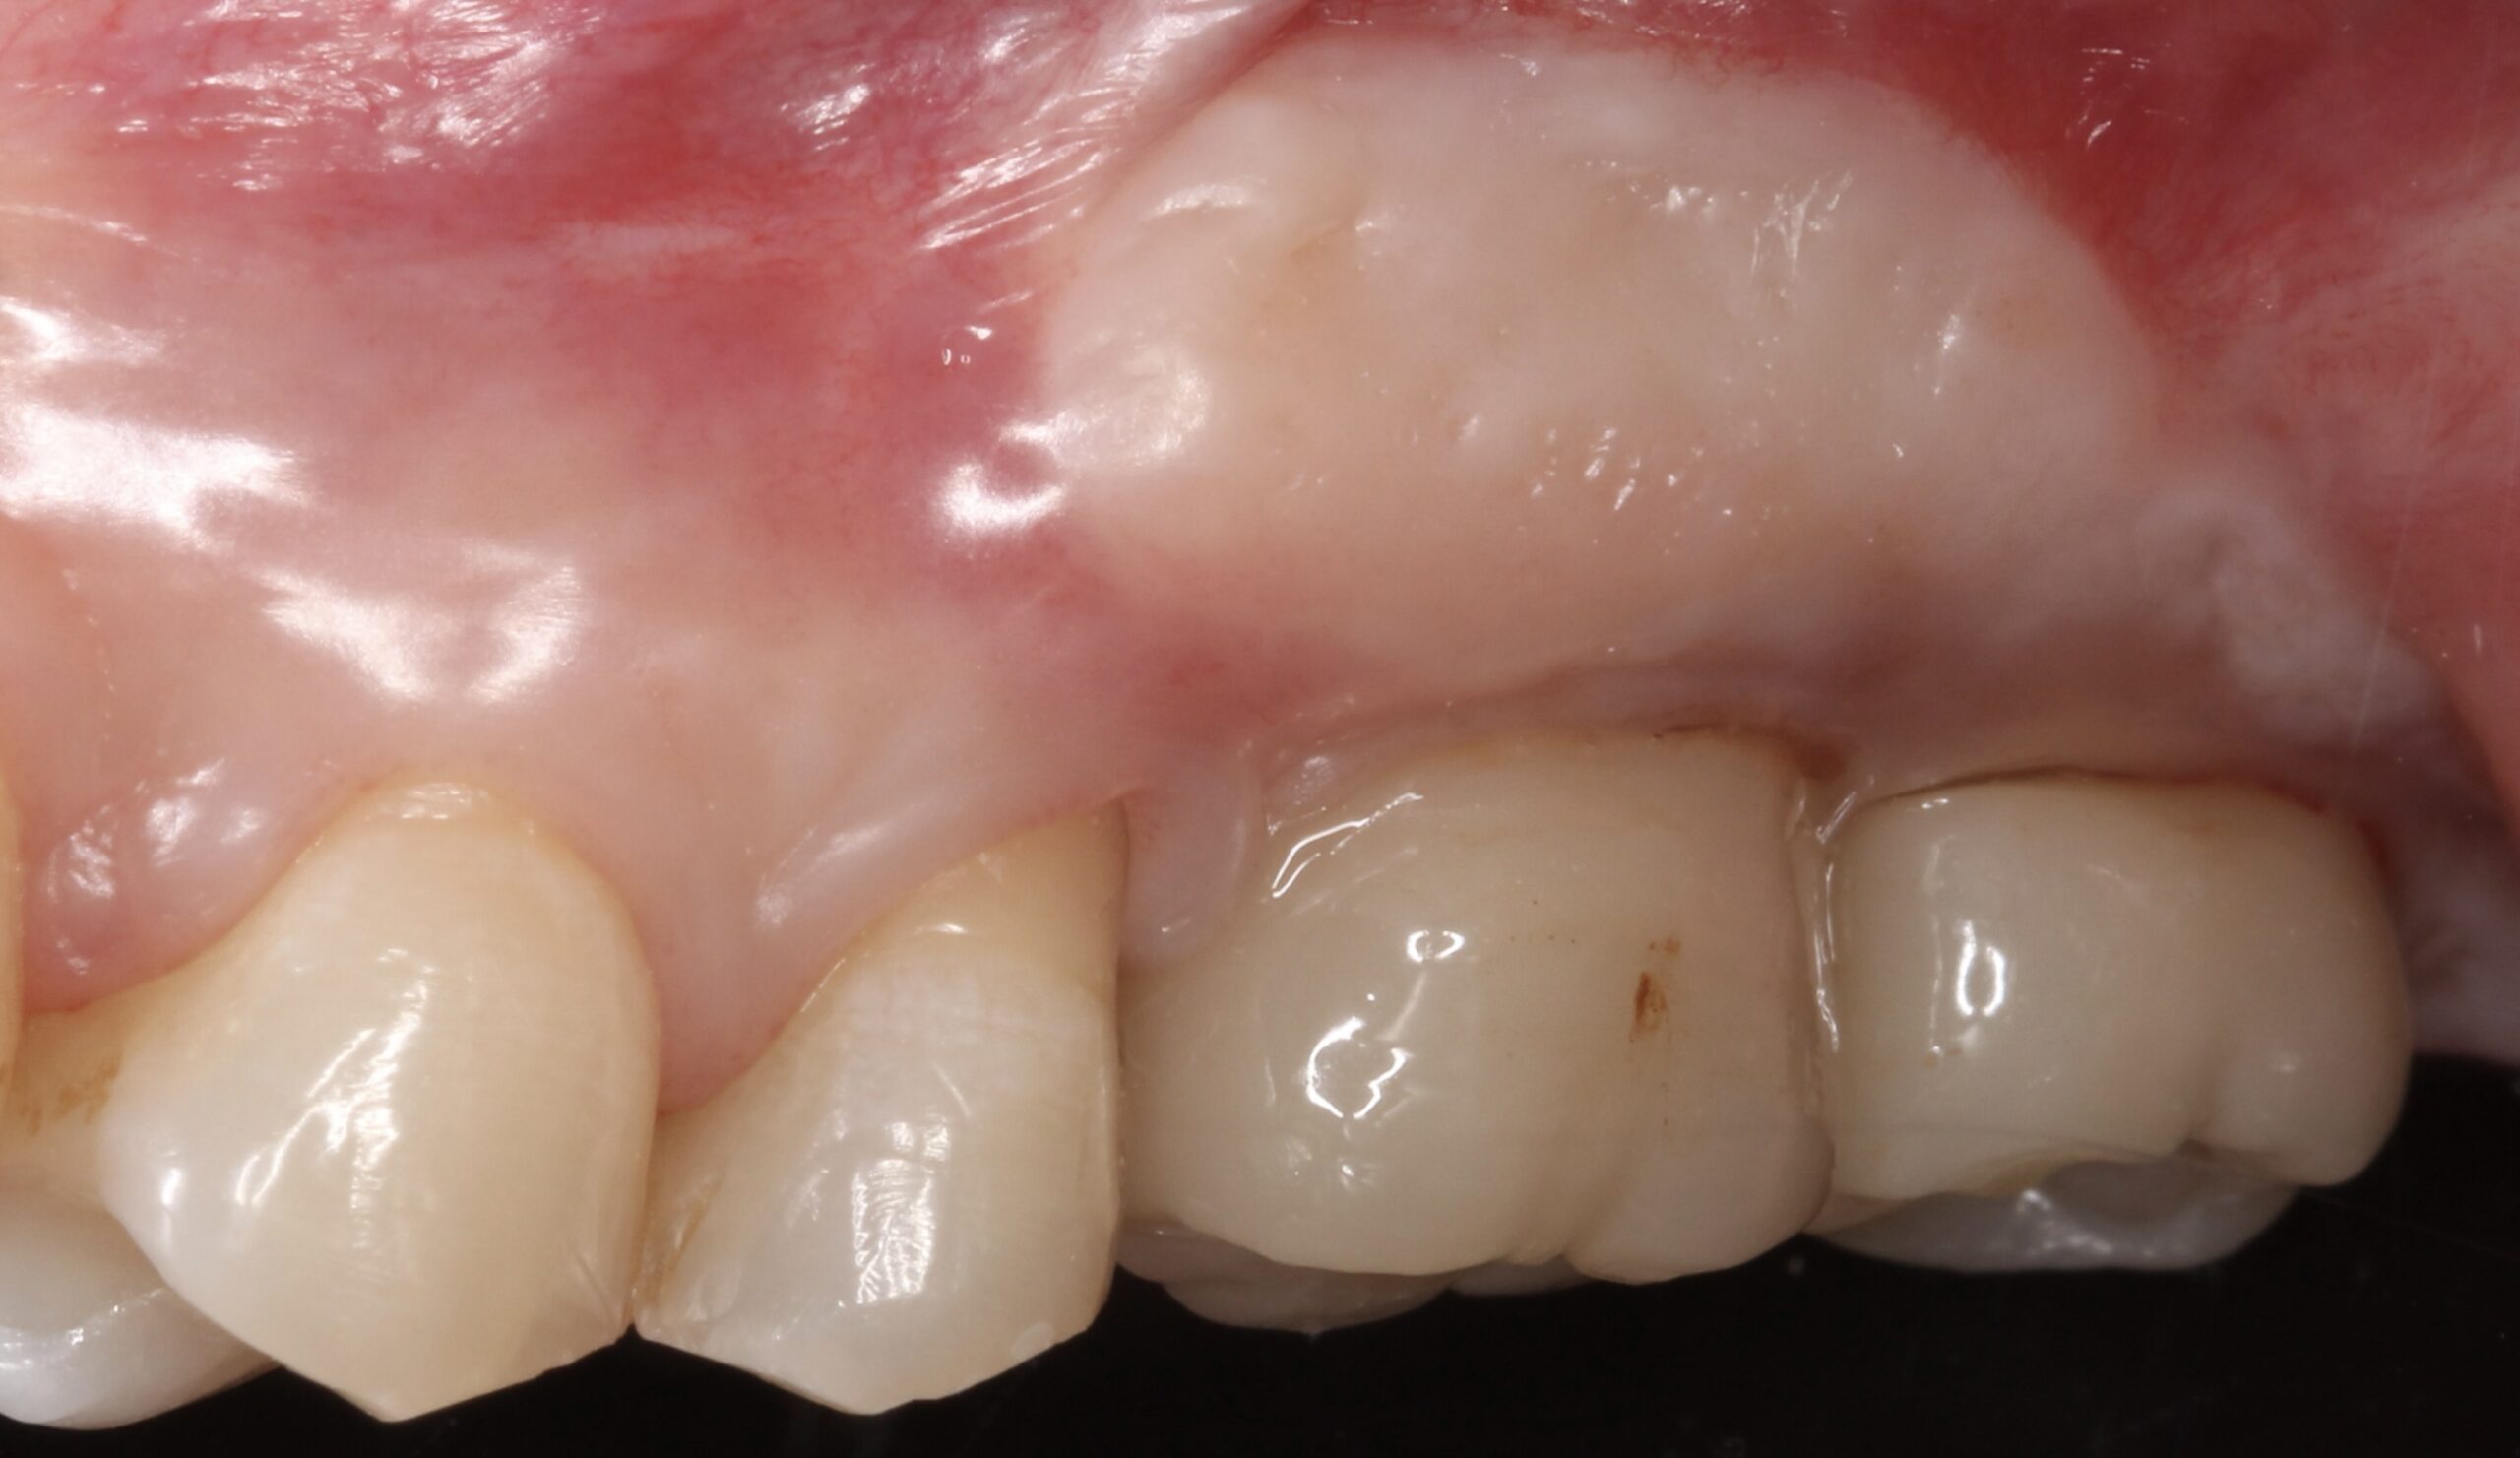
Figure 16.
Final crowns at 26 and 27 two years after loading.
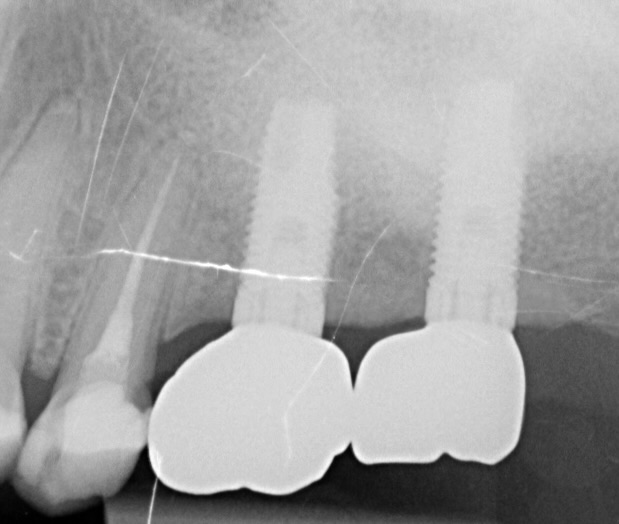
Figure 17.
Periapical x-ray 2 years after loading.
"3D bone regeneration performing the SBB technique by using 100% autogenous bone (blocks and scraped chips bone) is a fully predictable treatment for the severe bone atrophy on the posterior maxilla and Neoss® ProActive Implants can be placed confidently to restore severely atrophied alveolar ridges."
Dr. David González Spain 
Downloads